CAREFULLY READ ALL THE INSTRUCTIONS BEFORE STARTING THESE EXERCISES!
To start this assignment:
- Click the button in the upper right-hand corner that says Fork. This is now your copy of the document.
- Click the Edit button when you're ready to start adding your answers.
- To save your work, click the green button in the bottom right-hand corner. You can always come back and re-edit your gist.
1. Do Experienced Programmers Use Google Frequently? by Umer Mansoor (10 min)
- Your key take-aways OR how you're going to implement specific points (minimum 2):
- Using google does not make you a bad programmer, it is quite the opposite. Make the most out of google!.
- Don't blindly follow or copy-paste any solutions you come across. Carefully evaluate the results.
2. 20 Google Search Tips to Use Google More Efficiently by Joseph Hindy (15 min)
- Briefly describe (in your own words) each of the tips below AND provide an example of a search that captures the sentiment of the tip
- Tip 2: Use quotes to find a more specific result ("unterminated string meets end of file").
- Tip 3: Use hyphen to separate words open to more than one meaning. (You would use bat-animal or bat-baseball to exclude unwanted results)
- Tip 4: Use colons to only see a desired website. (e.g. Basketball:ESPN.com)
- Tip 9: Since you may not be able to find what your looking for with just one word, google gives you the freedom to look for something using multiple words. (e.g. coca-cola OR pepsi)
- Tip 13: Use a more professional terminology. Words that a website would use not an average person. (e.g. "Where can i find ramen?" being how you would normally ask vs "Japanese restaurants in denver").
- Tip 14: Keep it simple and use words that are relevant to what you're searching for. (Same example on tip 13 could be use here)
- Tip 17: Since something can be described in different ways try researching the same thing using different words. (e.g diving could be used in different context so trying scuba-diving would be a better search if that is what your looking for).
Before you create your Mod 0 calendar, we recommend going back to the Session 1 Lesson to review some tips from our most successful students re: calendaring and time management.
Create a calendar using a tool of your choice (Google Calendar, iCal, etc.) for the remainder of Mod 0 until your due date for the Mod 1 Prework. Your calendar should include the following:
- Each class session
- Relevant due dates: HW, Assessment submission, Mod 1 Prework, Cohort Orientation
- When do you plan to work on HW?
- When do you plan to work on the Mod 1 Prework (about 40 hours total)?
- When do you plan to review material covered in class?
- When do you plan to study for the assessment?
- When do you plan to make time for self-care?
- What other commitments do you have throughout the course of Mod 0?
As outlined in class, using different colors in your calendar for parts of your life (Turing, wellness, commitments, etc.) can make it easier to parse through your competing priorities. Here is a suggestion you could use for your Mod 0 Calendar...
- Mod 0 classes
- Outside prep (HW, Prework, studying, practice, assessment)
- Work/prior commitments
- Wellness
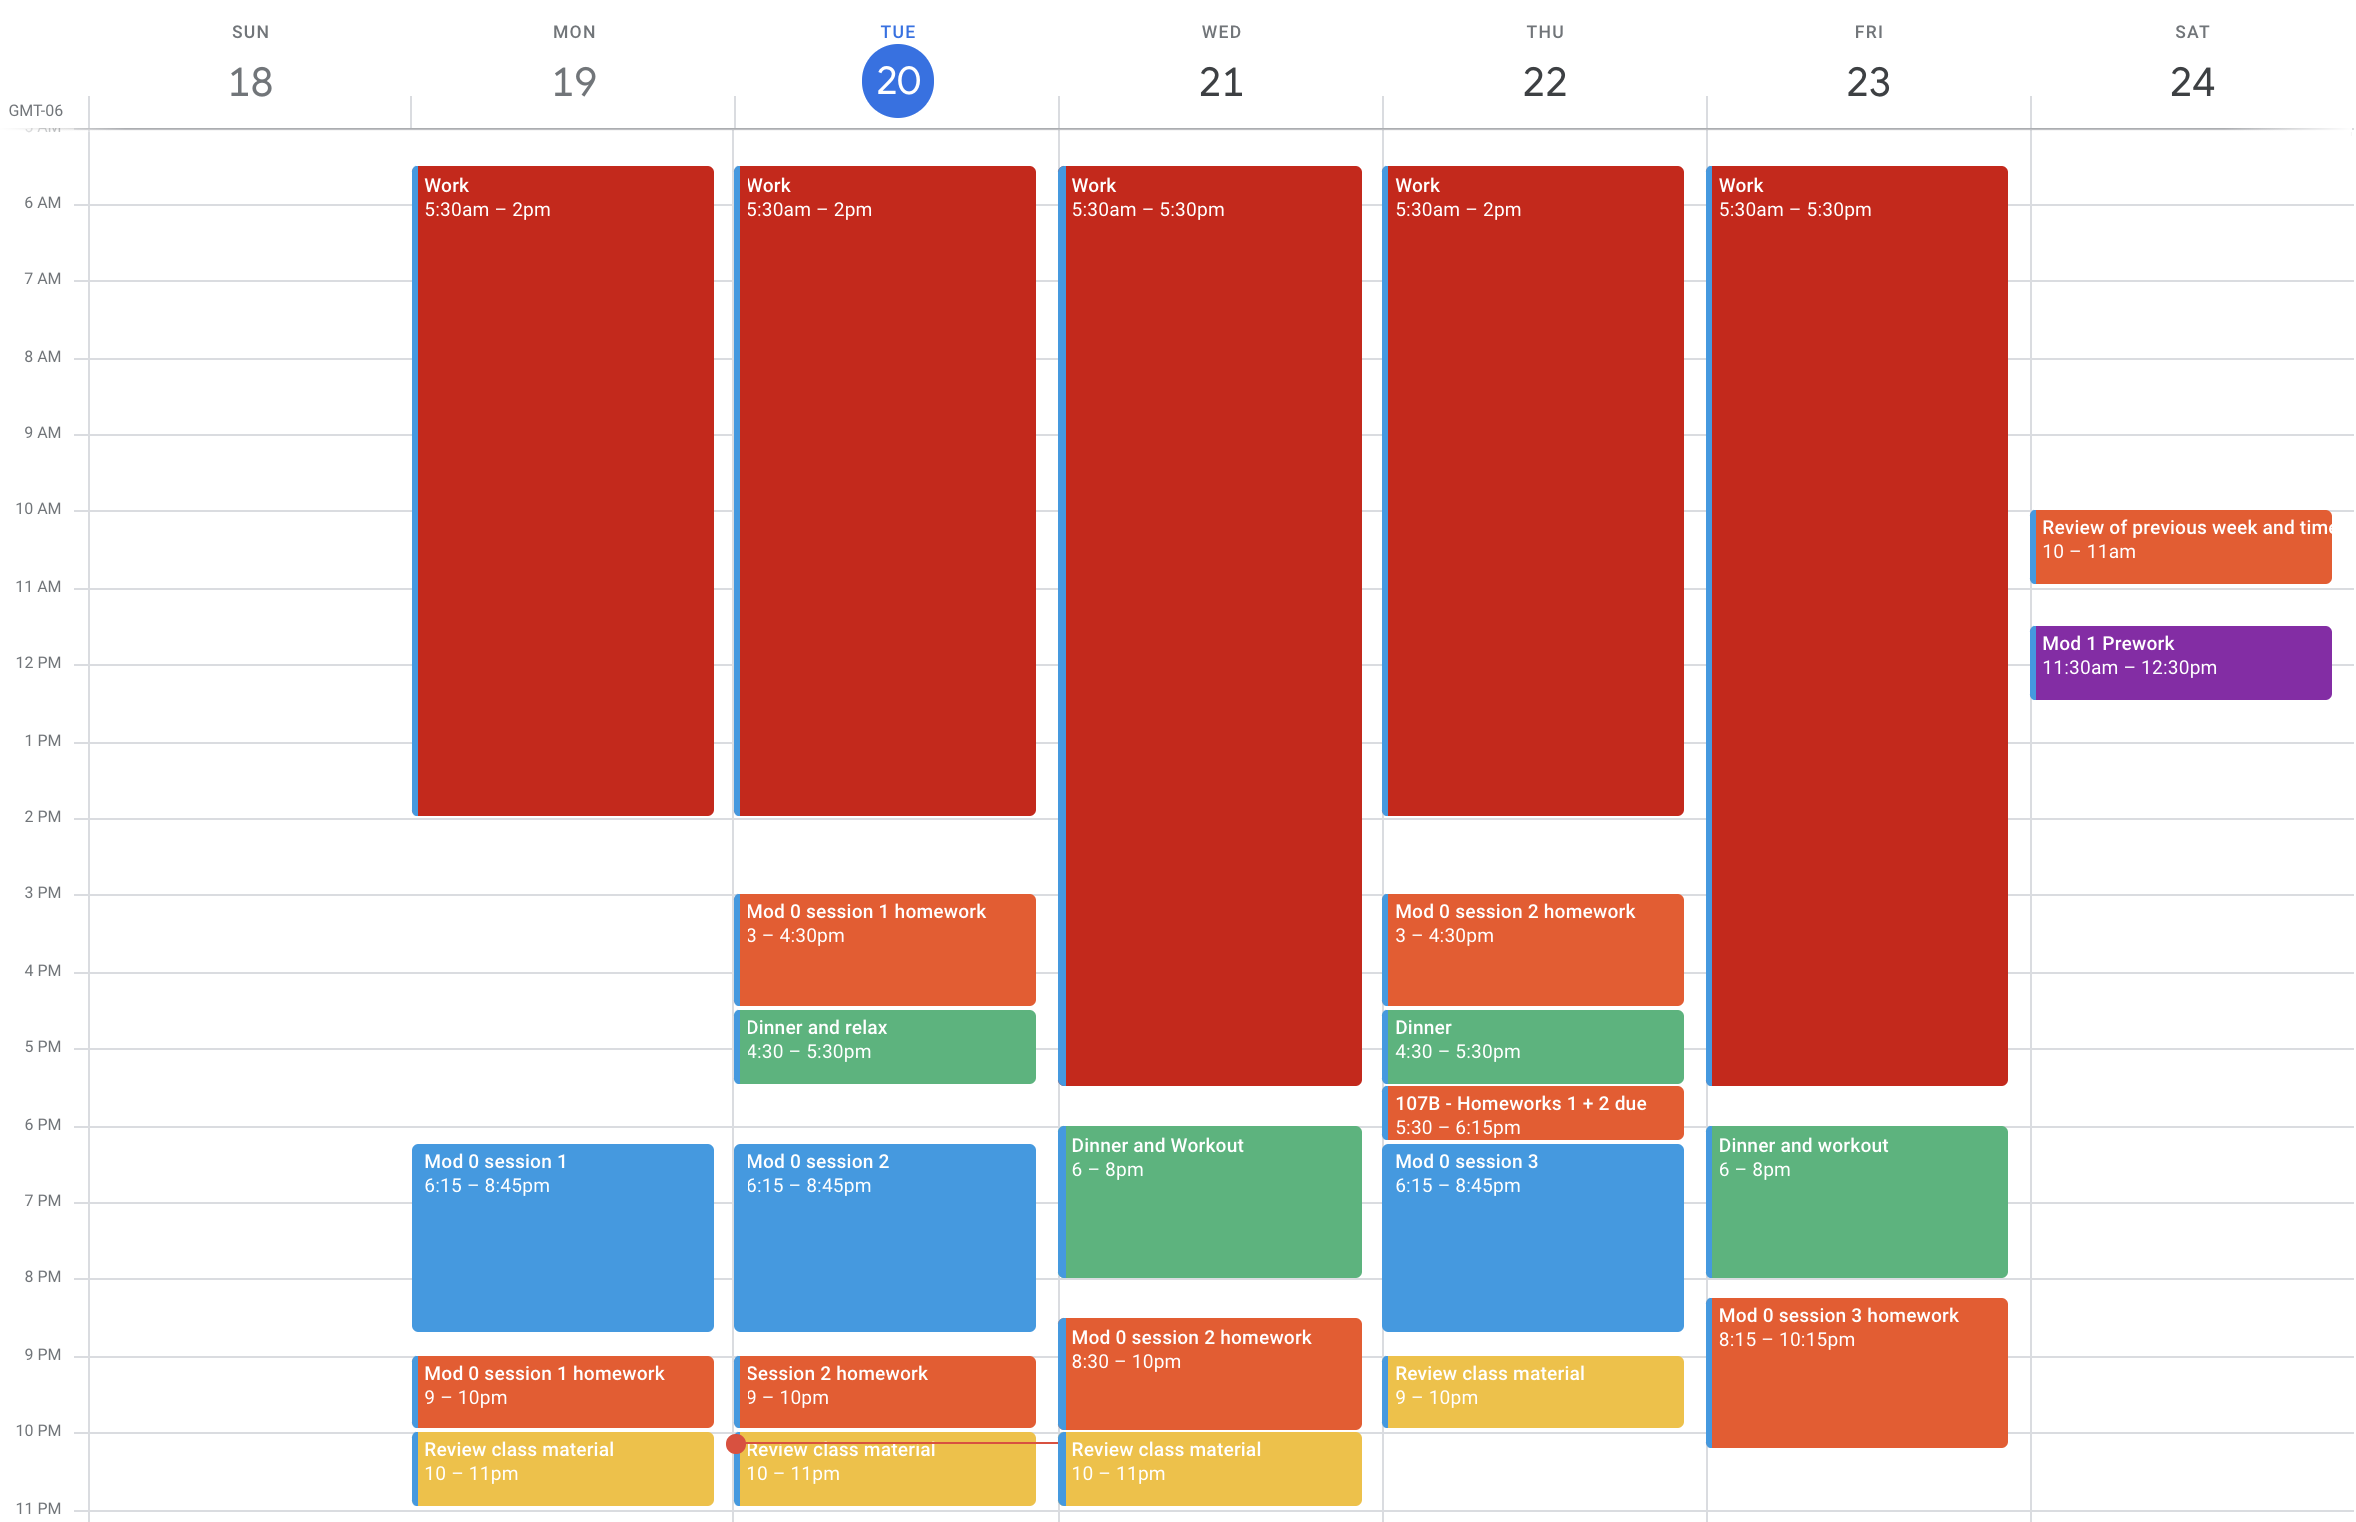
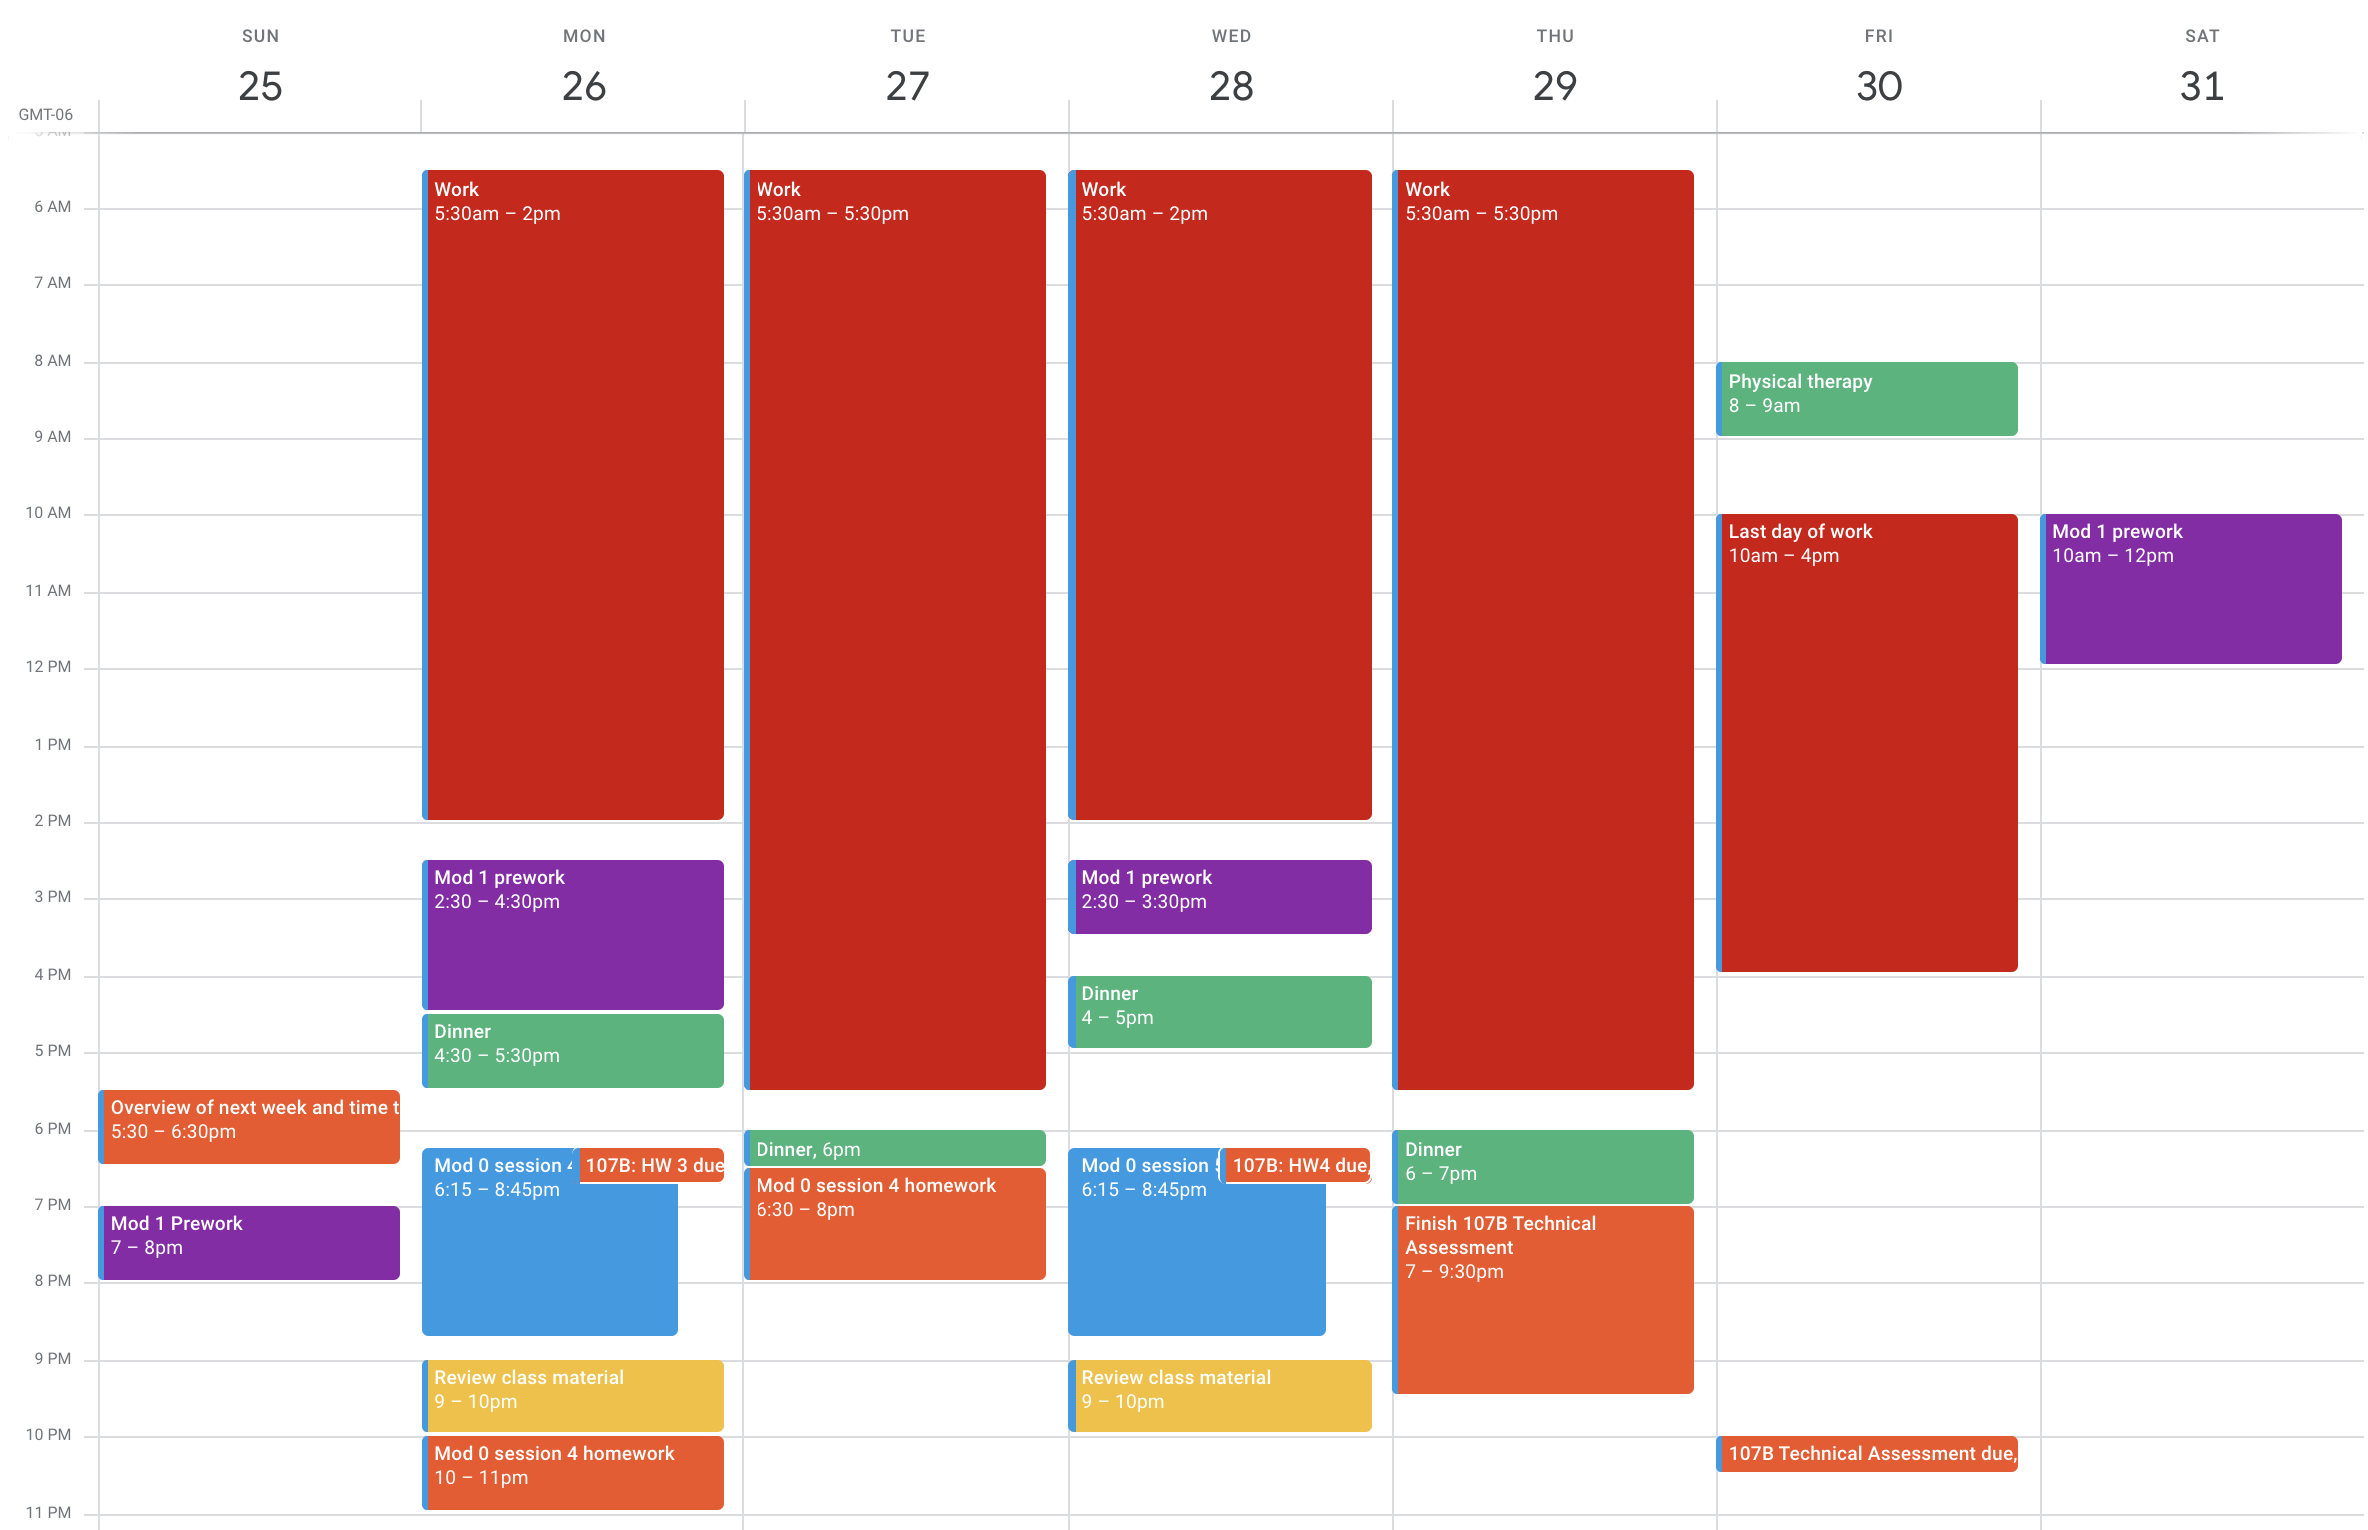
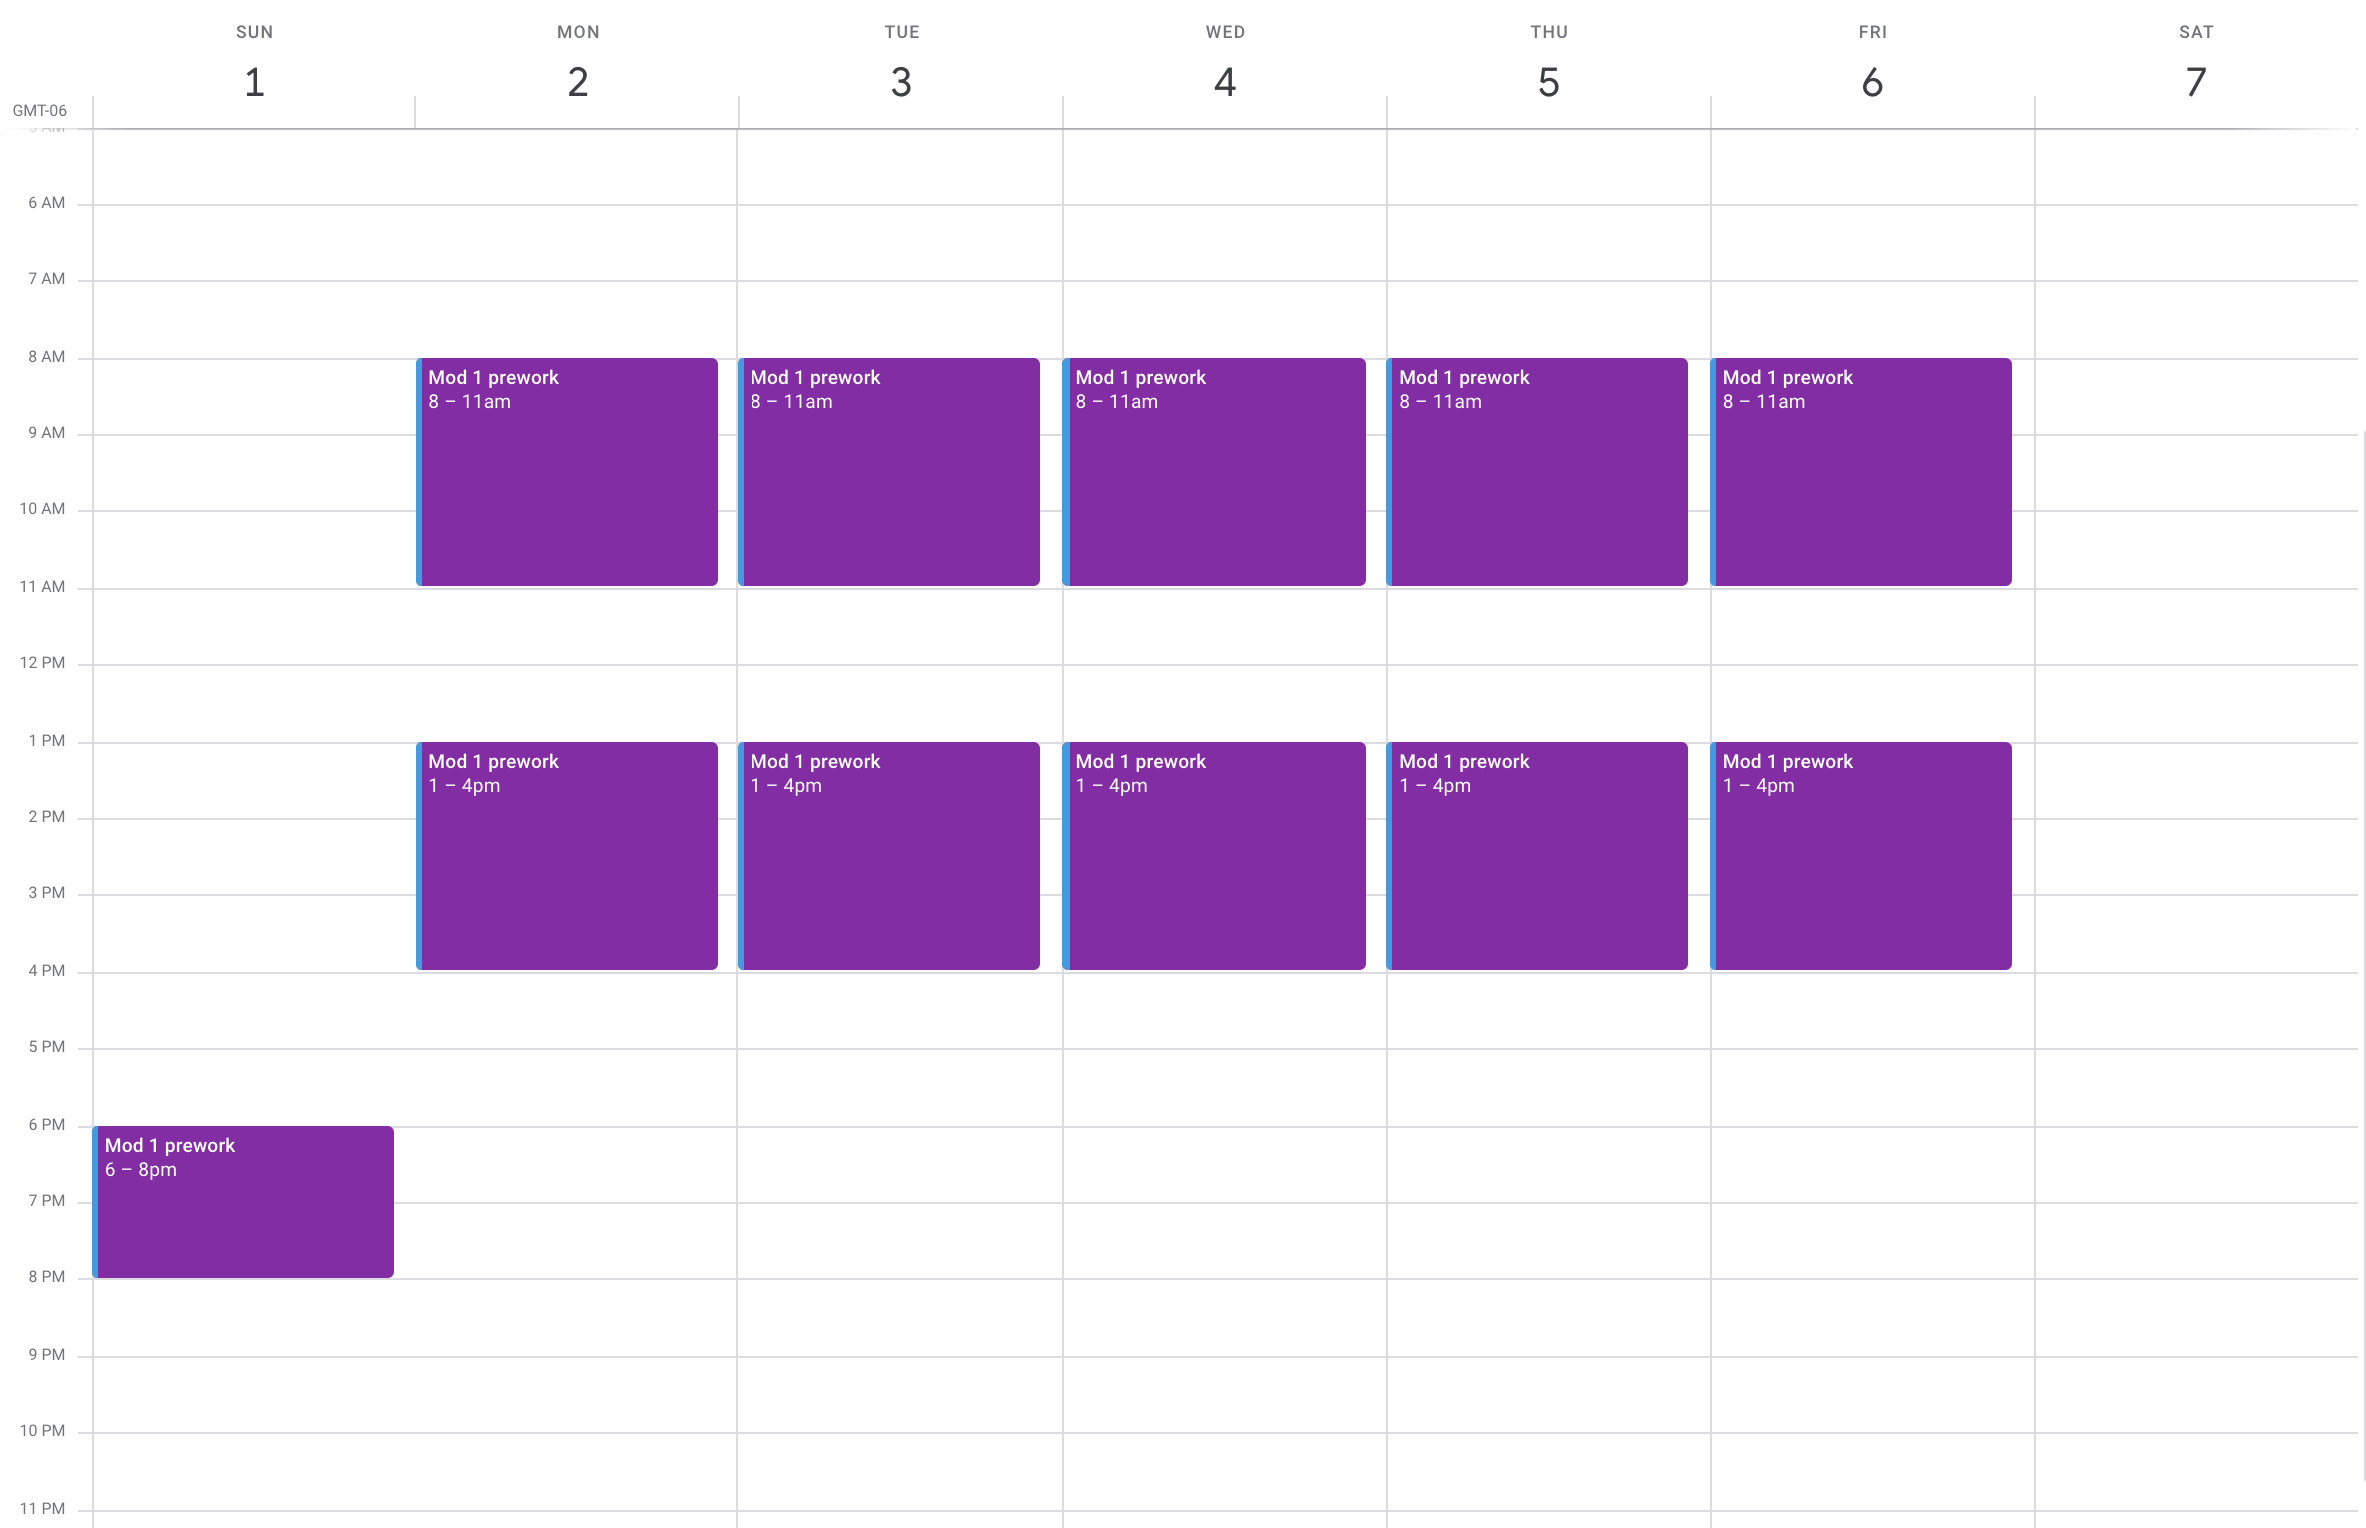
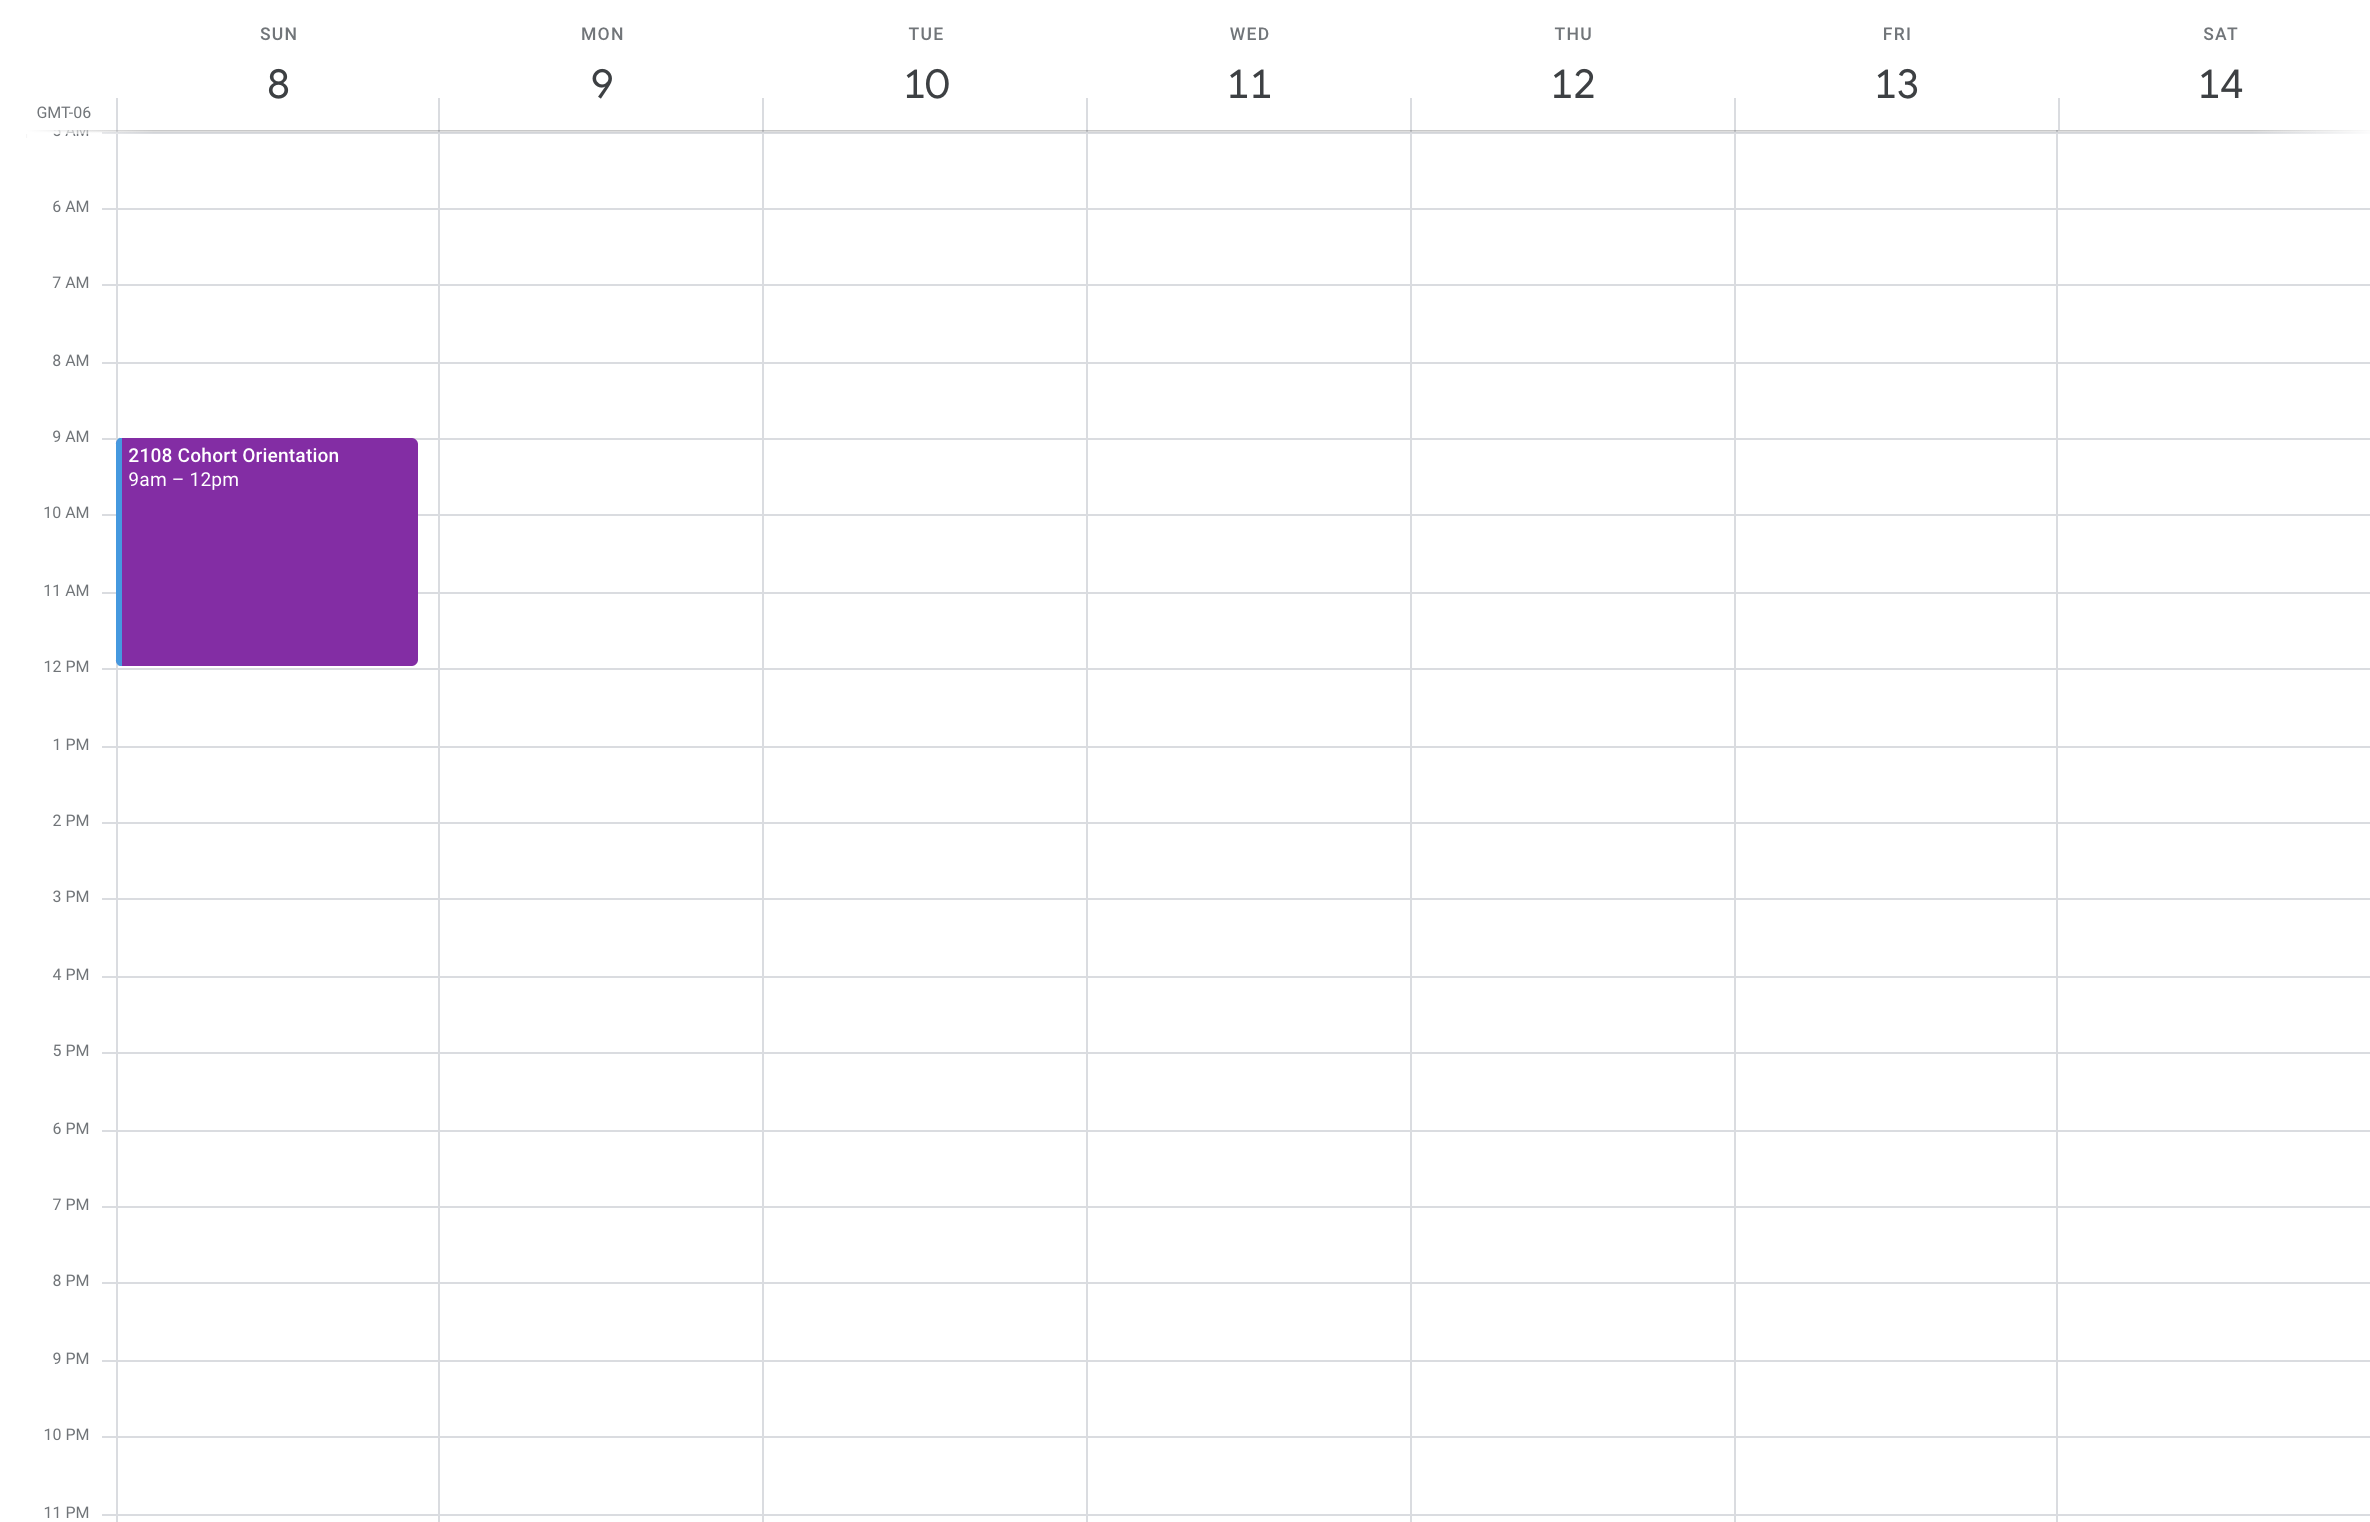
Take some time to build out your calendar for Mod 0 and add a few photos/screenshots below. You can take a screenshot on your Mac using CMD + SHIFT + 4 and drag around the area of your screen you want to capture!
The first answer in this StackOverflow post gives a great shortcut for easily adding images to your gists!
⬇ Add screenshots of your calendar below ⬇
If you are struggling to find time in your calendar to complete all of the M1 Prework please reach out to Eric Weissman (@ericweissman) on Slack to setup some time to discuss an alternate gameplan for completion!
Need help? You can go back to the files/directories portion of the lesson here.
Use commands in your terminal to create the directories and files structured exactly how they appear in the image below.

When you're done, type history to see your commands. Copy and paste the commands that were used to create the directory and files:
  I did evrething following the instructions but not all commands are showing up when I type "history".
  247  touch README.md
  248  touch styles.css
  249  mkdir dank_codes
  250  ls
  251  cd dank_codes
  252  touch data.rb
  253  touch app.js
  254  mkdir resources
  255  ls
  256  cd resources
  257  touch deployment.md
  258  mkdir utils
  259  ls
  260  cd utils
  261  touch utilities.md
  262  ls
- Make sure that your shell is set to zsh by running the following command:
$ chsh -s /bin/zsh. Remember to omit the$! Note that macOS Catalina and later operating systems already use zsh as the default shell. - [] Watch this video and follow each step to modify your own
zshrcconfiguration file. As mentioned in the video, you will need this snippet below:
# Load version control information
autoload -Uz vcs_info
precmd() { vcs_info }

# Format the vcs_info_msg_0_ variable
zstyle ':vcs_info:git:*' formats '%b'

# Determine if current working directory is a git repository
git_branch_color() {
  if current_git_status=$(git status 2> /dev/null); then
    parse_git_dirty
  else
    echo ""
  fi
}

# Change branch color if working tree is clean
parse_git_dirty() {
  if current_git_status=$(git status | grep 'Changes to be committed:\|Untracked files:\|modified:|deleted:' 2> /dev/null); then
    echo "%F{red}"
  else
    echo "%F{green}"
  fi
}

# Set up the prompt (with git branch name)
setopt PROMPT_SUBST
PROMPT='%F{white}%d $(git_branch_color)${vcs_info_msg_0_} %f$'
After you have saved this file, be sure to quit and restart your terminal.
We will be working more with git in the next session and will be able to see some of these changes take effect!
Use these shortcuts to quickly move around within your environment.
command + spacebar- Open a program or search for a filecommand + tab + tab ...- Cycle through open programscommand + ~- Switch between separate open windows of the same programcommand + q- Quit an open program
Start by making sure Rectangle is running with command + spacebar then type rectangle and then return. You should see a window icon at the top right of your menu bar.
Click the icon to see a dropdown of your shortcuts.
Click preferences to customize them.
command + option + enter- Full Screen Current Windowcommand + option + left arrow- Left Half Current Windowcommand + option + right arrow- Right Half Current Windowcommand + option + up arrow- Top Half Current Windowcommand + option + bottom arrow- Bottom Half Current Window
Start by opening Chrome with the shortcut (command + space) you already learned.
command + d- Bookmark current pagecommand + t- Open new tabcommand + n- Open new windowcommand + shift + n- Open new window in Incognito modecommand + l- Highlight current URLcontrol + tab- Cycle through tabs to the rightcontrol + shift + tab- Cycle through tabs to the leftcommand + shift + r- Reload pagecommand + w- Close tab
This video from Technical Programs Instructor Amy Holt gives some great screen management tips.
Using the rubric below, assess how you did with these exercises. These are the same metrics your instructors will use to determine if you are prepared for Mod 1!
- I read carefully read ALL directions
- I completed all parts of the exercises (not including Extensions) to the best of my ability
- I used correct syntax, spacing and naming conventions
- I followed ALL formatting instructions
- I pushed myself out of my comfort zone and experimented/broke things to try to learn
- I spent no longer than 20-30 mins Googling a specific problem before asking for help
- I went back to the lesson to search for clarification before asking for help
Are you stuck on something? Here is the BEST way to ask for help:
- Start or reply in the thread with the problem you are facing. Be sure to follow the guidelines for asking questions below:
- I can explain what I am trying to do or accomplish
- I can what I have tried so far and/or what resources I've tried online
- I can describe specifically what I am stuck on
- I provided screenshots and/or code examples to give context
- If I provided short code examples, I used
inline code formattingfor single lines of code/error messages - If I provided larger blocks of code, I used a code snippet in the correct format (such as
.jsor.rb)
- If I provided short code examples, I used
- Usually, your classmates will be able to answer your question or point you in the right direction very quickly! If not, an instructor will reply within 24-48 hours
@JRicardoT
Nice work overall! Great job building out that file structure. I can see enough of the history that I can tell you were navigating through your file structure the right way. Keep up practice in your terminal, as well as with keyboard shortcuts, so some of that workflow is feeling more natural by the time Turing starts.
Good start with your calendar, though there are areas to improve. It looks like work takes a lot of your time right now, but the last day is in sight (wooo!). Some things to think about: