Skip to content

Instantly share code, notes, and snippets.

@0mj
Forked from theotherzach/00_project_setup.md
Last active March 1, 2022 20:54
Show Gist options
  • Select an option

  • Save 0mj/663e782ce5d55d48bbfc63dc9c28e3f5 to your computer and use it in GitHub Desktop.

Select an option

Save 0mj/663e782ce5d55d48bbfc63dc9c28e3f5 to your computer and use it in GitHub Desktop.
This is a Ruby adaptation of Uncle Bob's Bowling Kata

Ruby Bowling Kata Description : Part 1 of 2

This is a Ruby adaptation of Uncle Bob's Bowling Kata in Java, which can be found here. The following test cases will be covered:

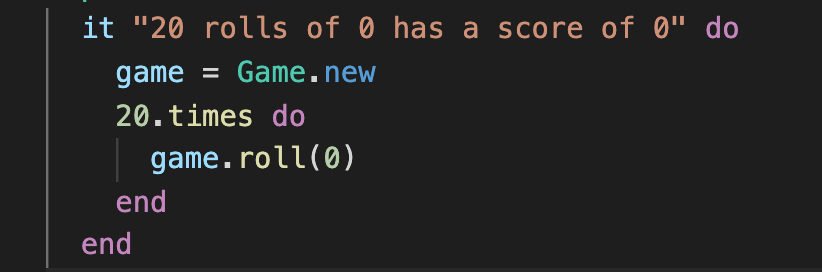
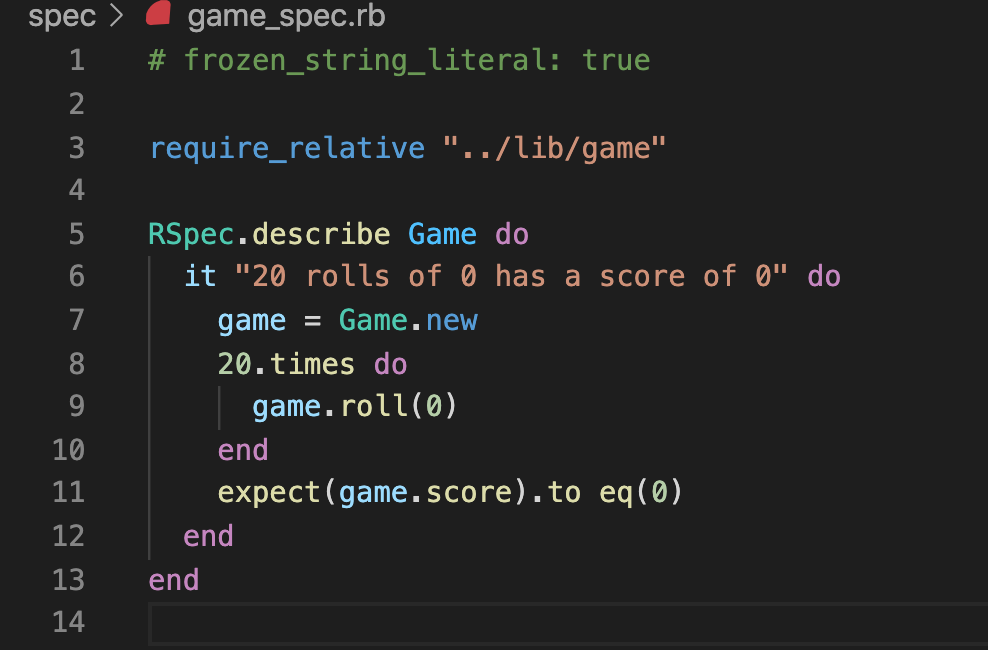
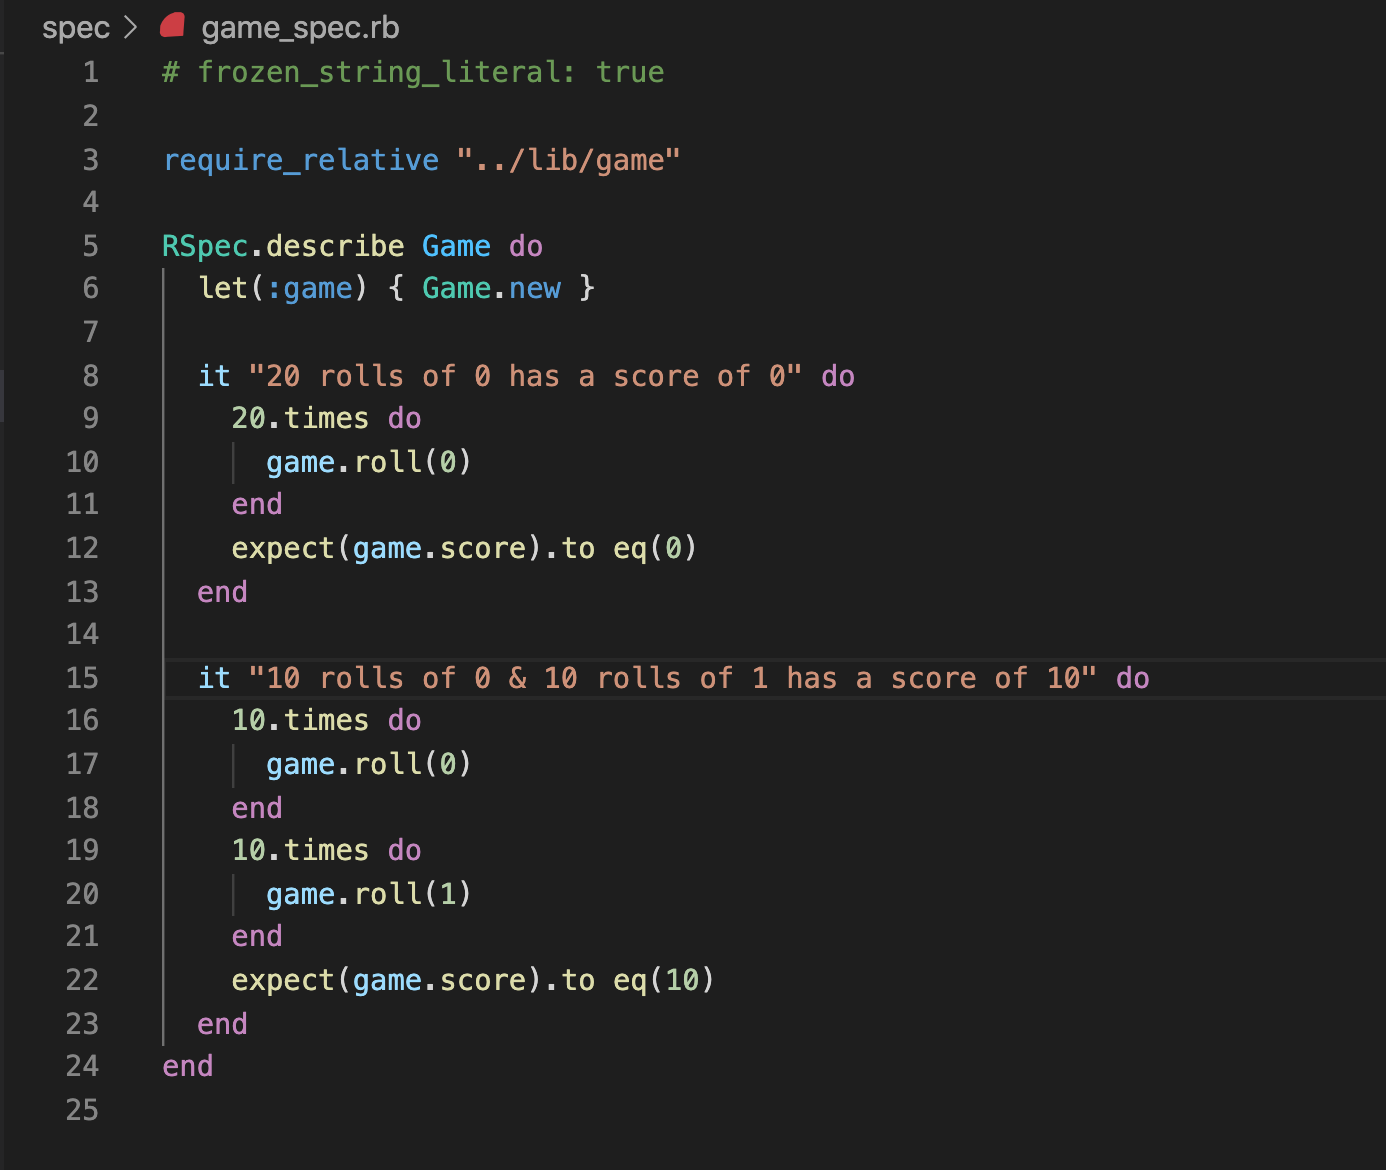
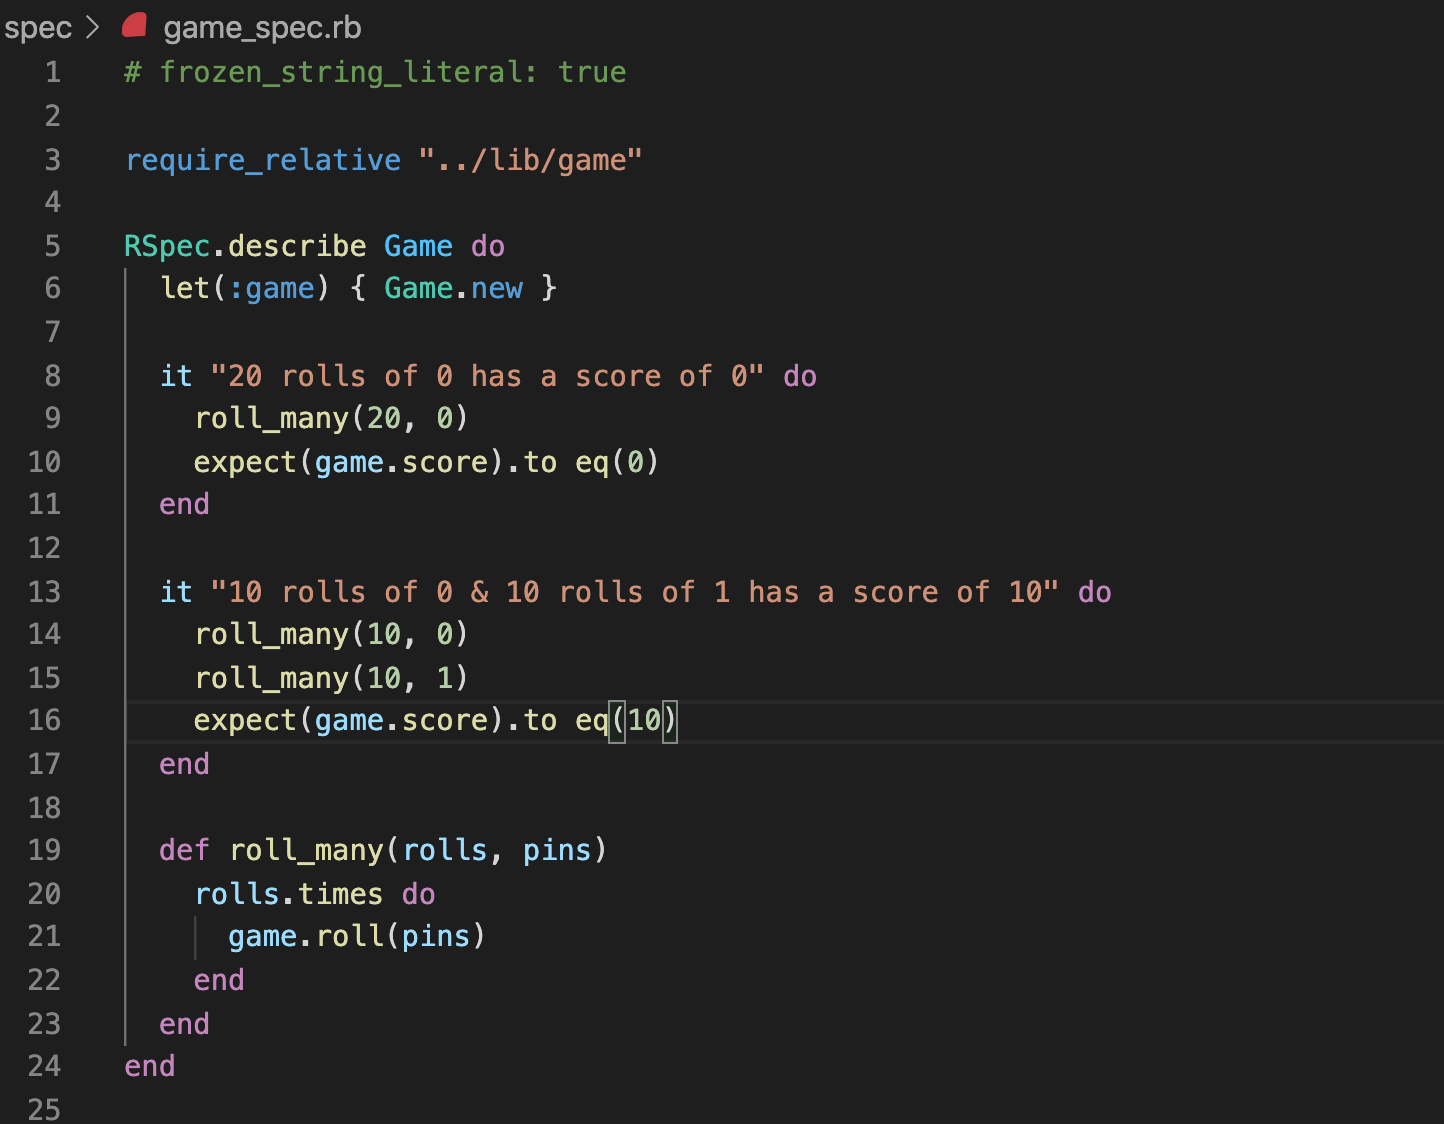
  • A game with 20 rolls of 0 must have a score of 0.
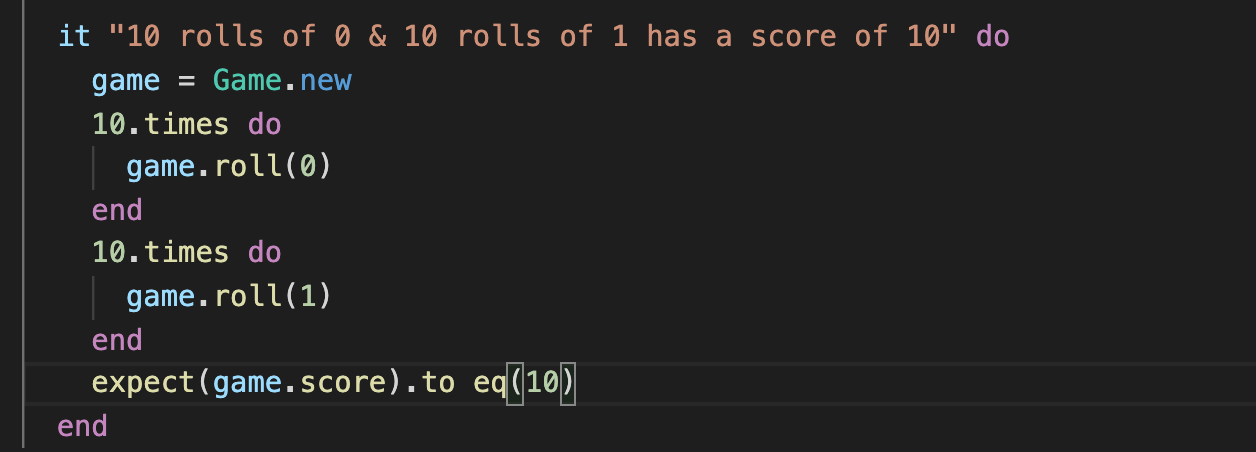
  • A game with 10 rolls of 0 & 10 rolls of 1 must have a score of 10.
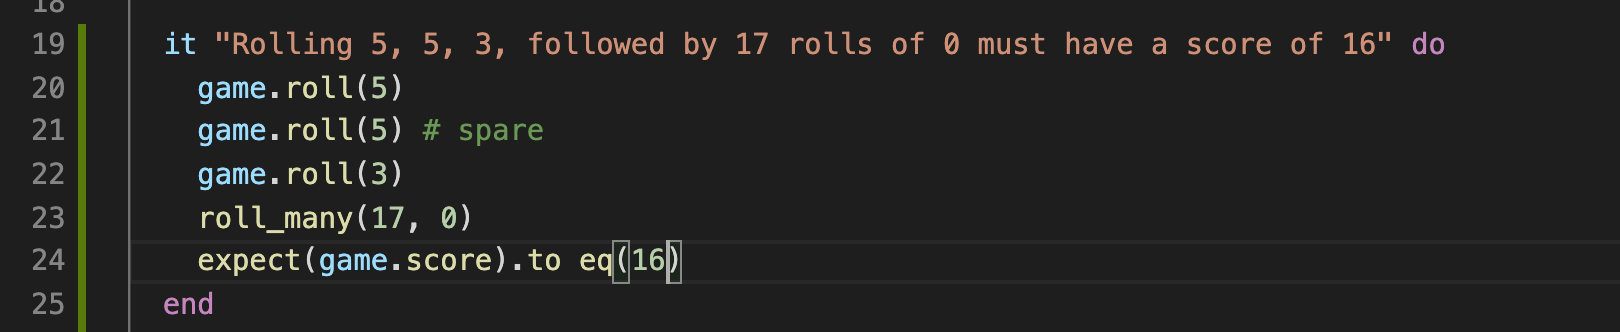
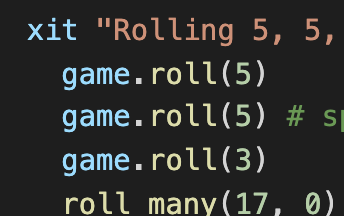
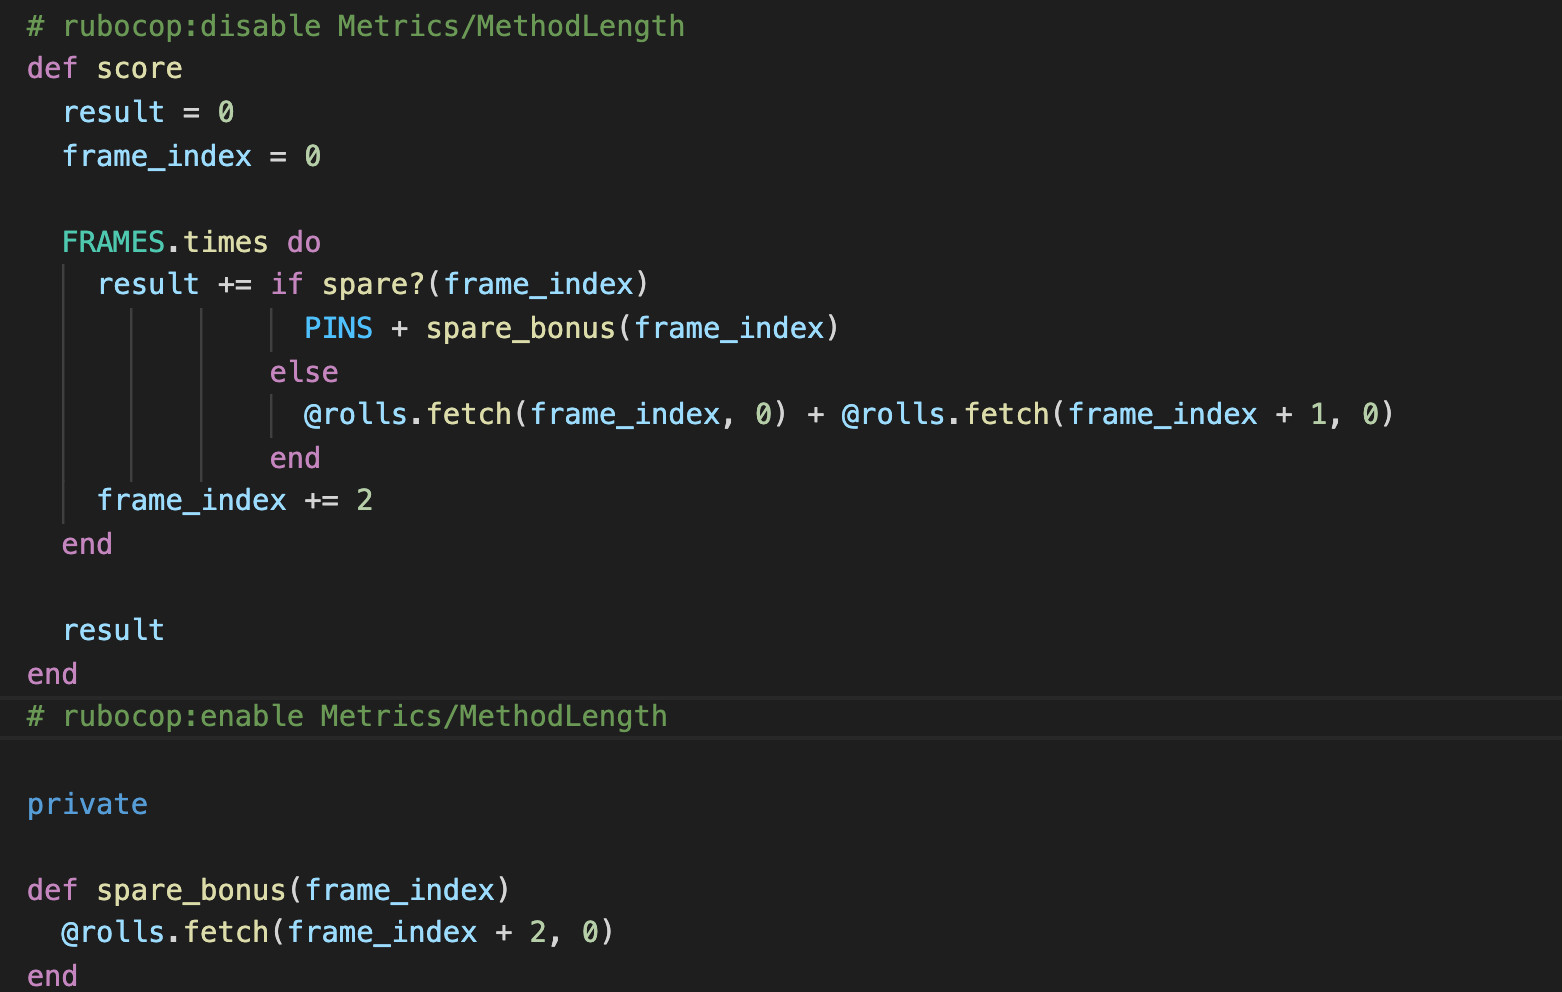
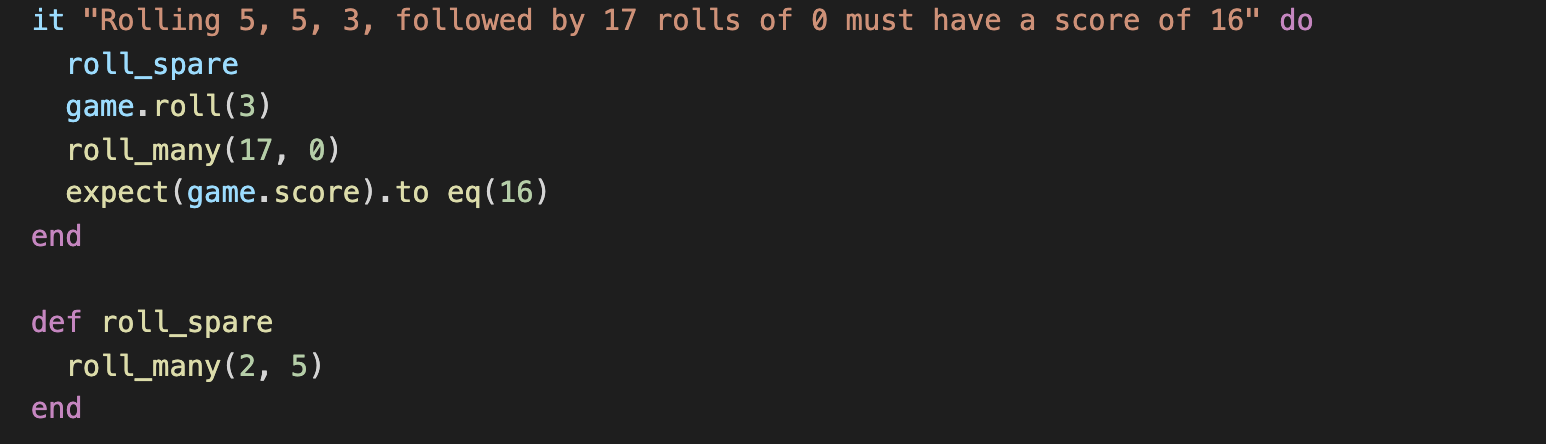
  • A game with the rolls 5, 5, 3, and 17 rolls of 0 must have a score of 16 (The two 5's are a spare.)
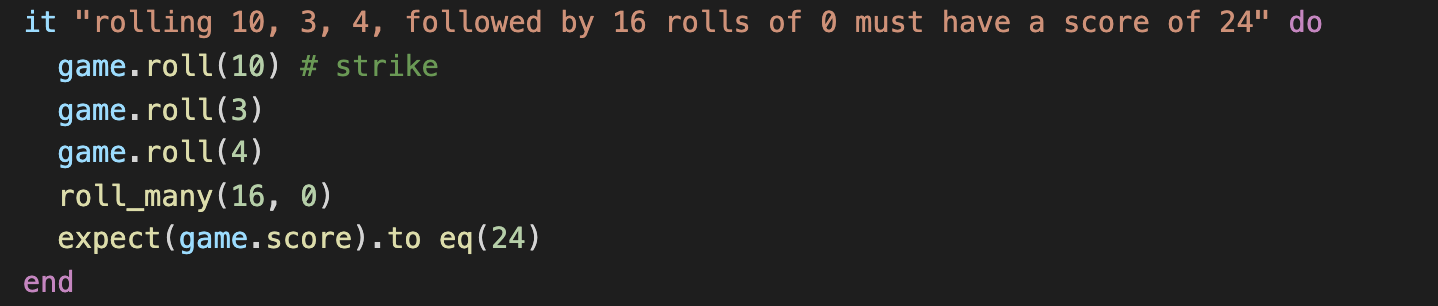
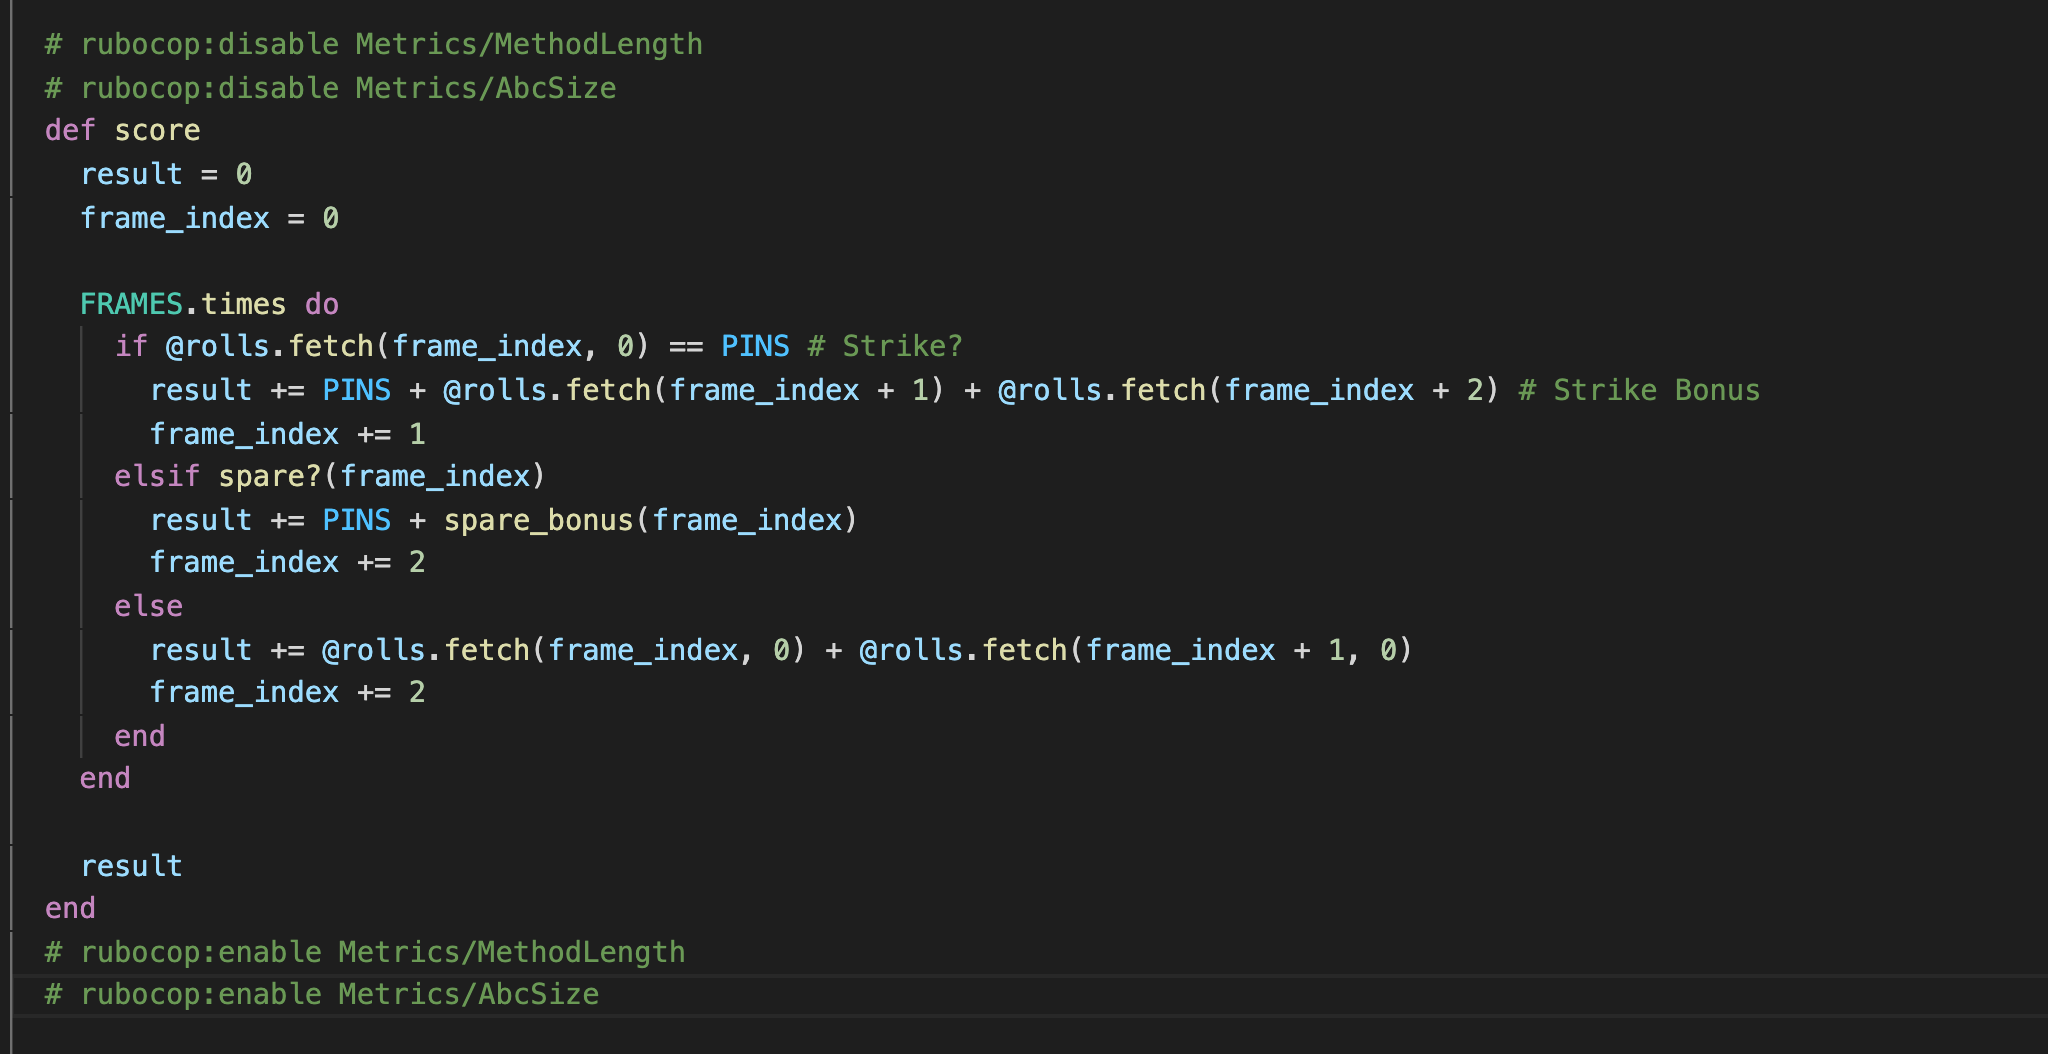
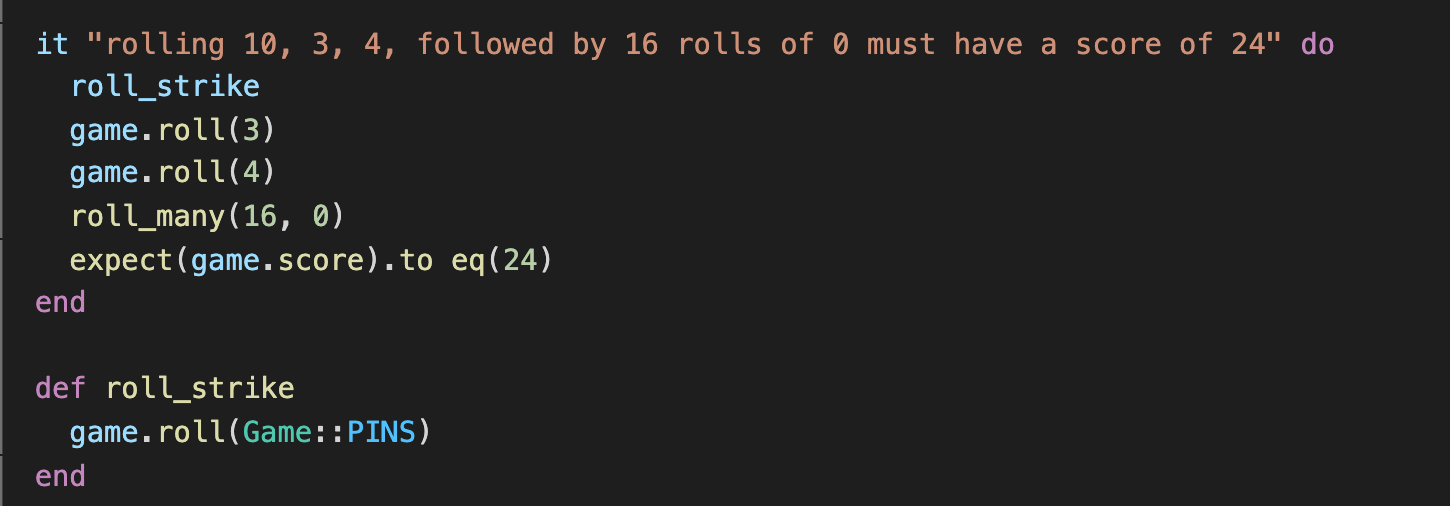
  • A game with the rolls 10, 3, 4, and 16 rolls of 0 must have a score of 24 (The 10 is a strike.)
  • A game with 12 rolls of 10 must have a score of 300

Bowling Rules

You do not need to know them to complete this Kata, but if you want to know the rules in detail, this is a good resource. It is very handy to know some basics:

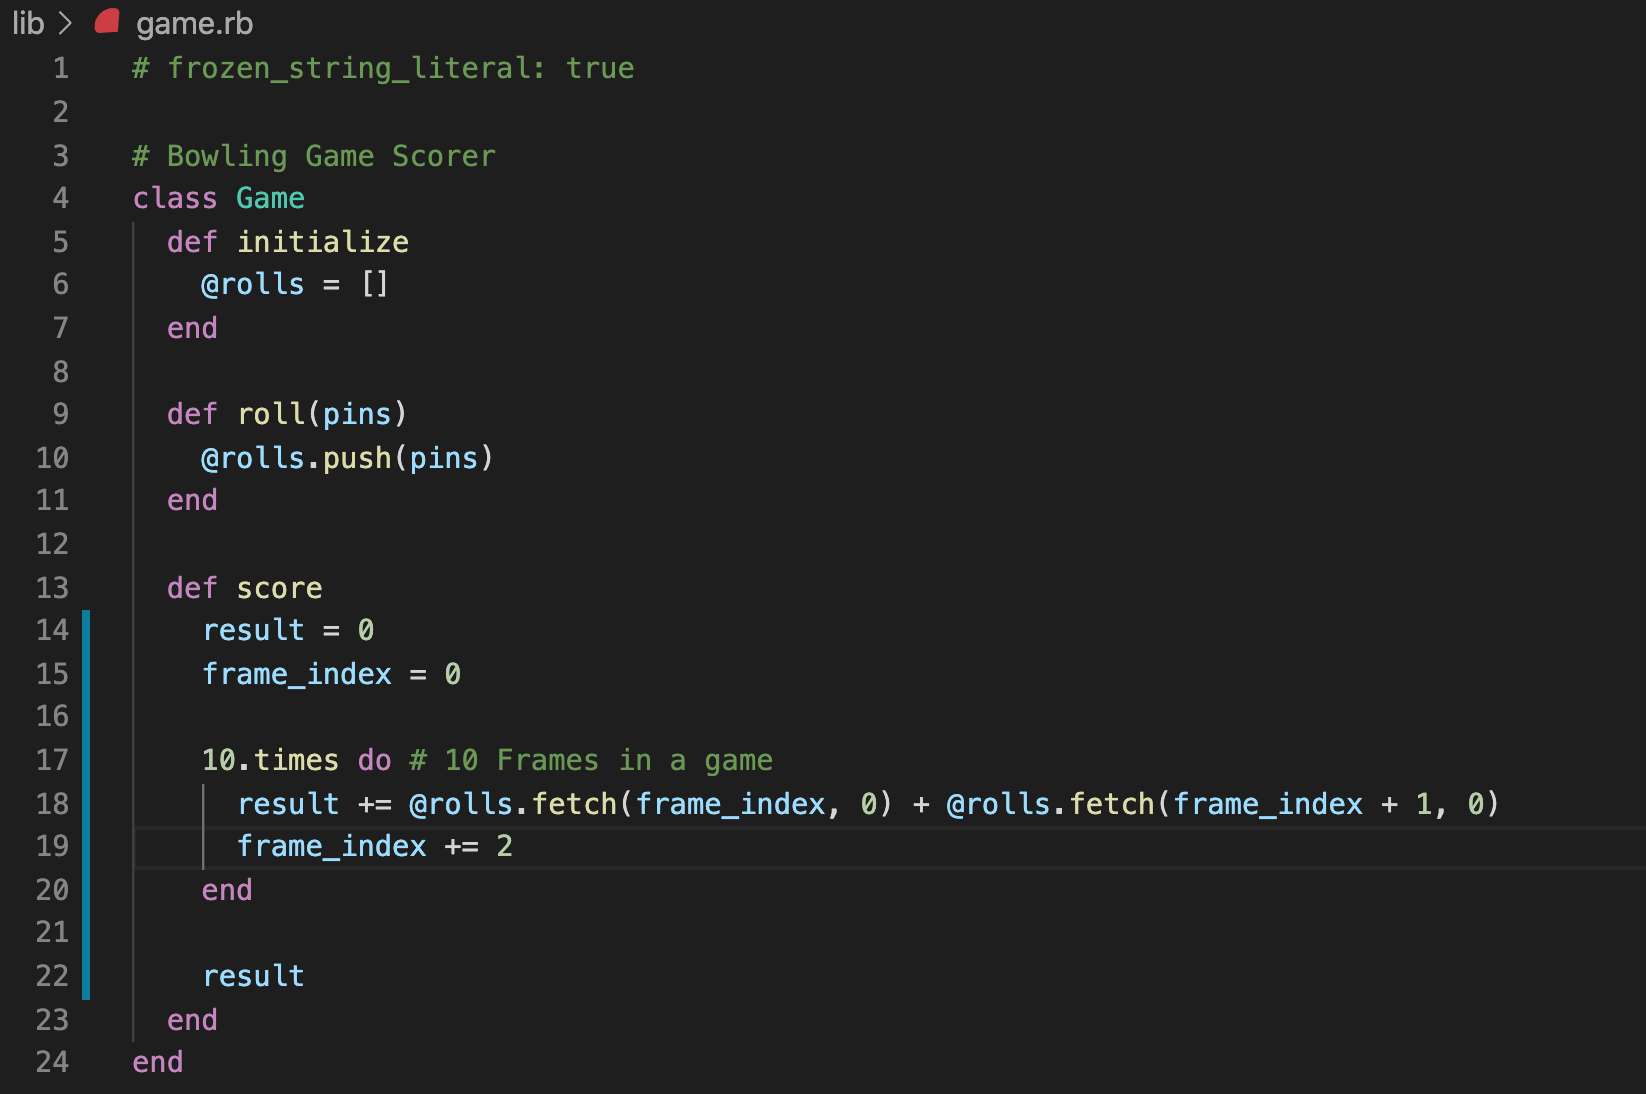
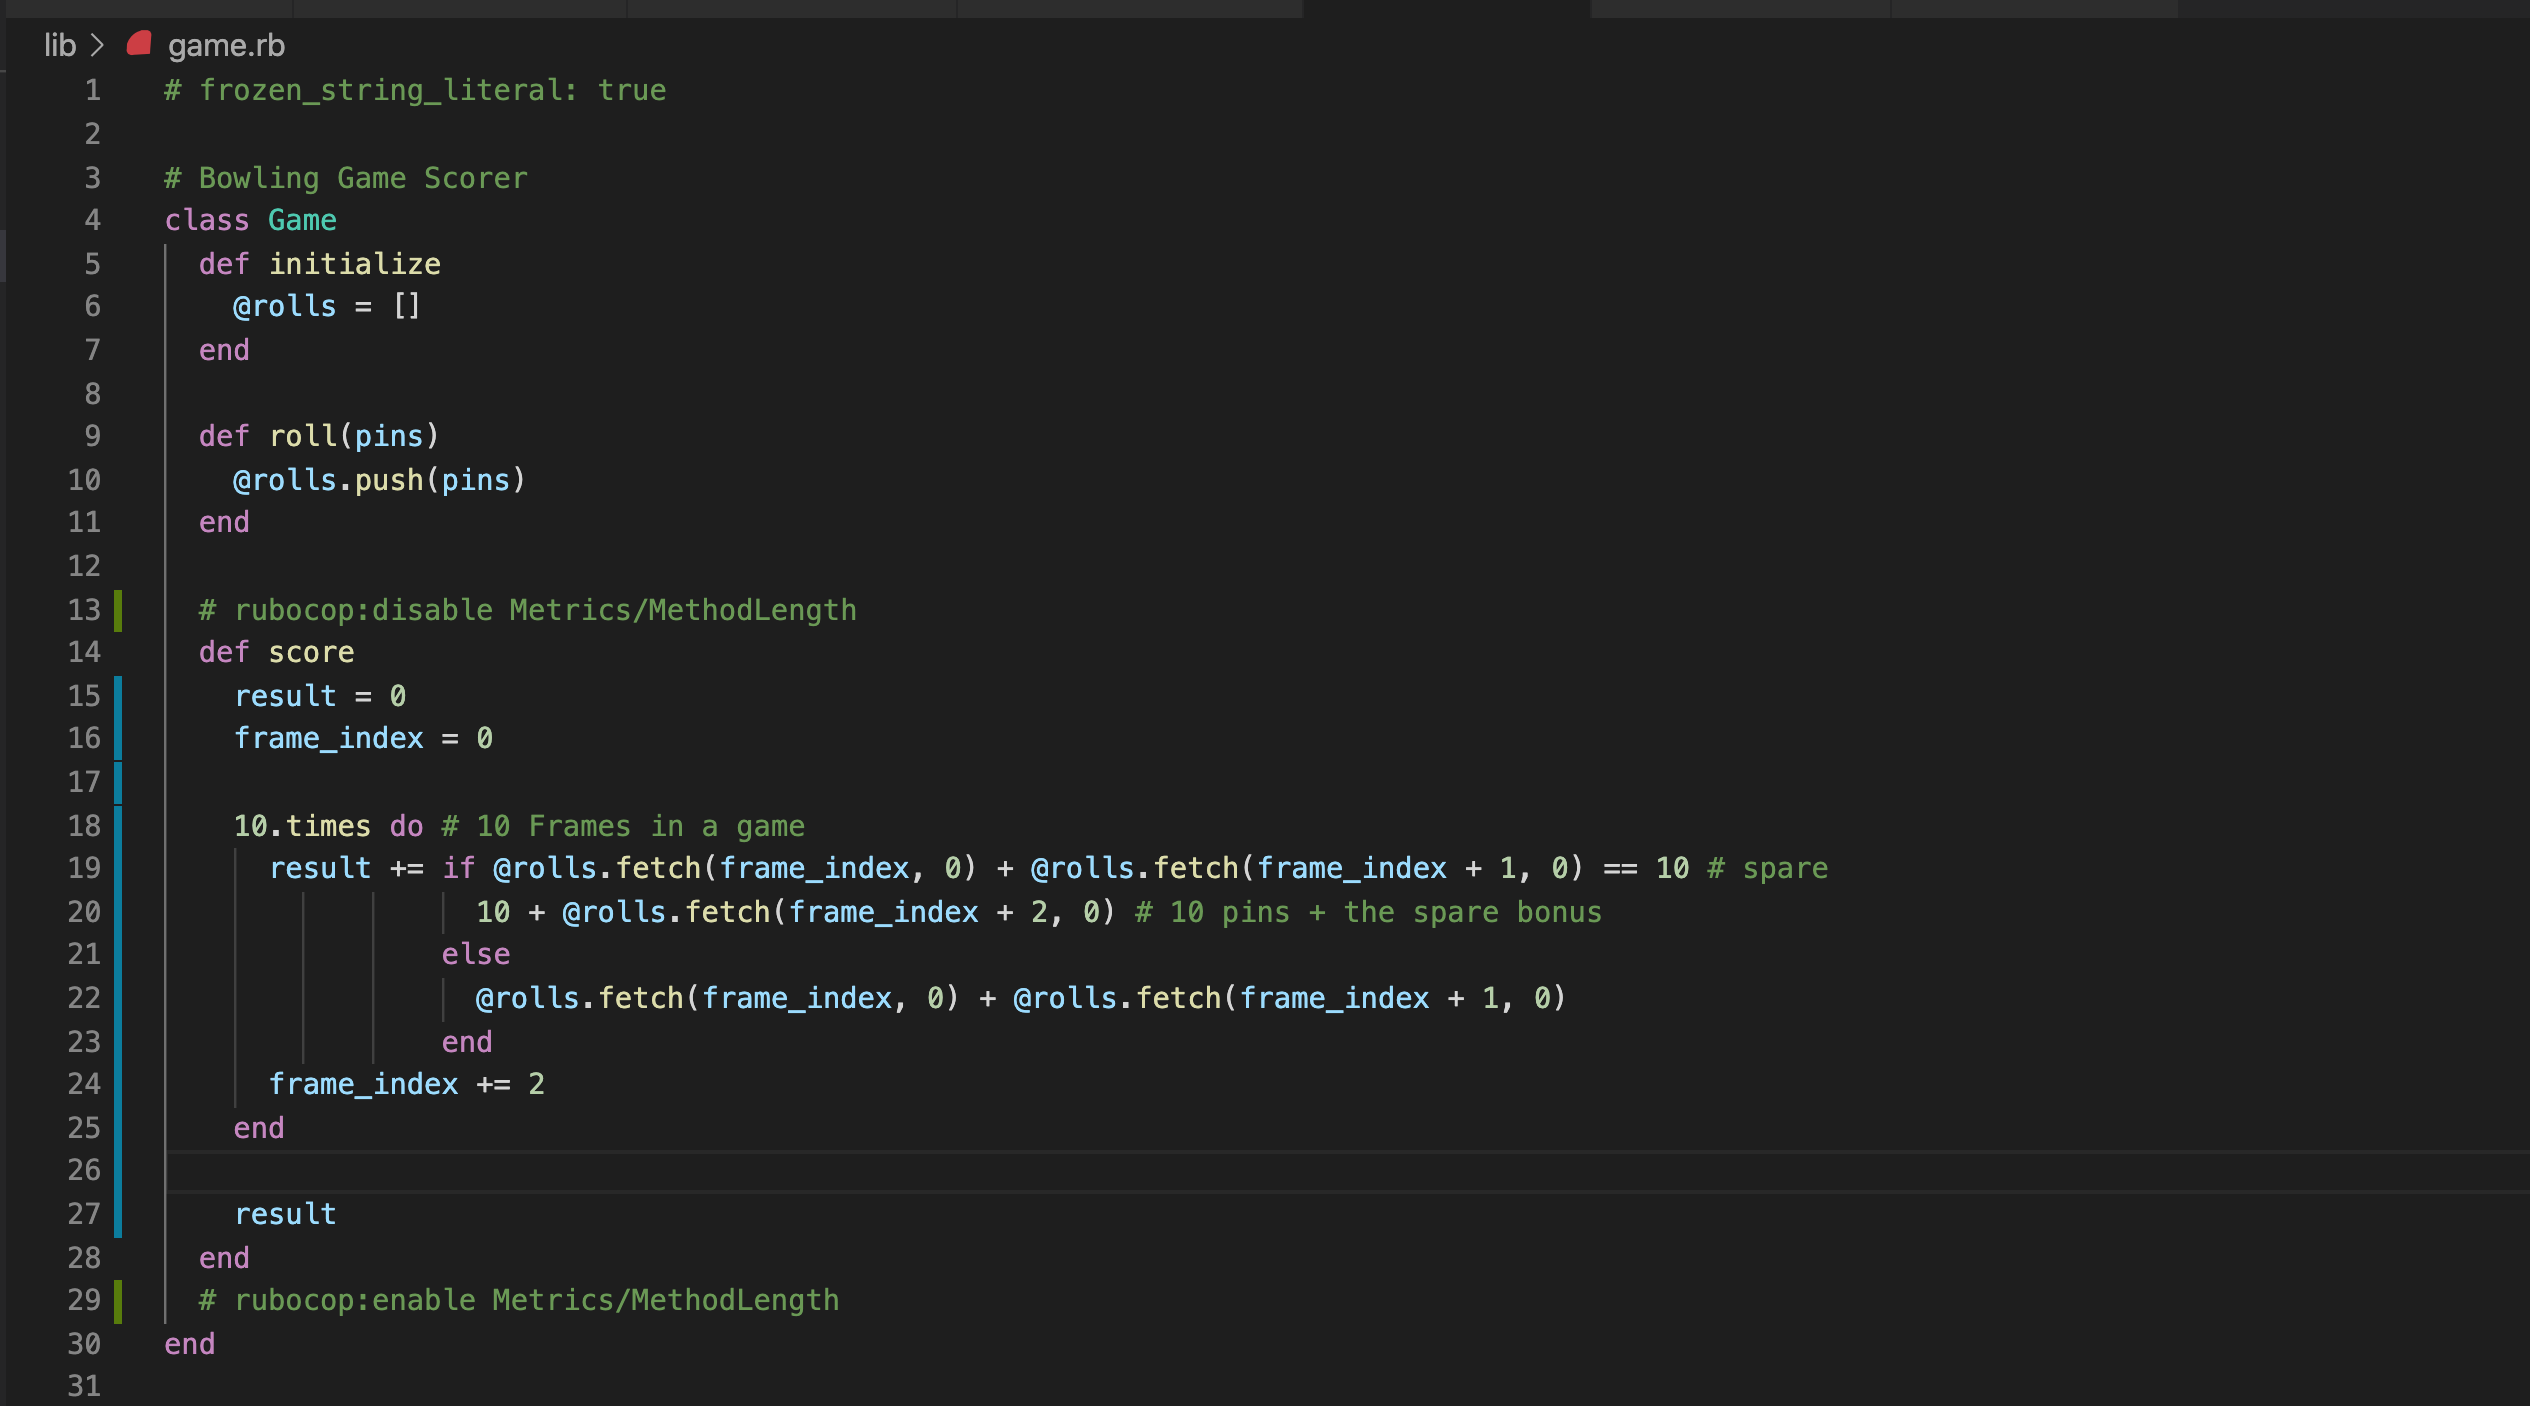
  • For the most part, you keep score by adding the number of pins knocked down in each frame.
  • Special bonuses are awarded for strikes and spares.
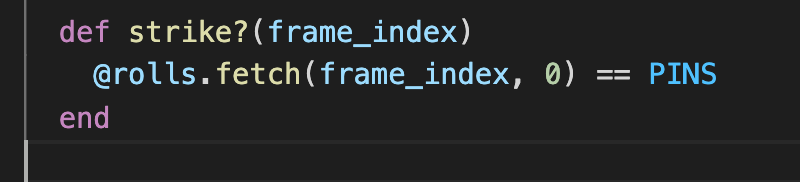
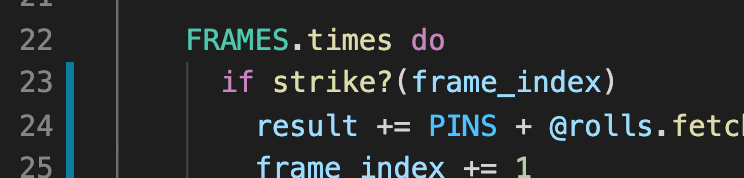
  • When a strike is bowled, the bowler is awarded the score of 10 (for knocking down all ten pins), plus they get to add the total of their next two rolls to that frame.
  • For a spare, the bowler gets the 10, plus the total number of pins knocked down on the next roll only.

A kata is meant to be memorized. Students of a kata study it as a form, not as a conclusion. It is not the conclusion of the kata that matters, it's the steps that lead to the conclusion. If you want to lean to think the way I think, to design the way I design, then you must learn to react to minutia the way I react. Following this form will help you to do that. As you learn the form, and repeat it, and repeat it, you will condition your mind and body to respond the way I respond to the minute factors that lead to design decisions. - Uncle Bob

The Ruby Bowling Kata Steps

You're expected to do this from memory

Project Setup

Creating the directory & opening it in your editor

  • Delete the directory from your previous kata run. Probably cd ~/ && rm -rf ~/code/ruby-bowling-kata
  • Re-create the directory. I suggest mkdir -p ~/code/ruby-bowling-kata
  • cd (change directory) into your project root. Probably cd ~/code/ruby-bowling-kata
  • Open the directory as a project in your editor of choice. (This is usually VS Code.)

Boilerplate Project setup

All these commands assume your working directory is your project root. I suggest running commands from your Ubuntu terminal rather than using VSCode's terminal.

Pushing this code to Bitbucket, Github, or any other remote git server is not part of this kata.

  • create the file .ruby-version with the contents
    2.6.6
    
  • We'll be using bundler to manage our dependencies, so run gem install bundler && bundle init
  • Append the following lines to your newly created Gemfile:
    • Screen Shot 2020-09-25 at 12 49 46 PM
    • RSpec is our test framework of choice
    • We use Rubocop to enforce code conventions
  • Install the dependencies via running bundle install
  • Initialize rubocop via bundle exec rubocop --init
    • append the following to .rubocop.yml
    • Screen Shot 2020-09-25 at 12 54 27 PM
  • create the lib directory
  • create the spec directory
  • add a new file lib/.keep
  • add a new file spec/.keep
  • run rubocop with autocorrect via bundle exec rubocop -A Manually correct any outstanding issues.
  • initialize git
  • commit all files

The Code

Workflow

  • Run your specs: bundle exec rspec
  • Run rubocop: bundle exec rubocop -A
  • Lint & Commit your code after each test

Test 0: Create The Files

RED

  • Create the file spec/game_spec.rb & add the following
    • Screen Shot 2020-09-25 at 1 03 37 PM
  • verify that your specs are failing because it doesn't know what a Game is
  • Create a the file lib/game.rb & add the following
    • Screen Shot 2020-09-25 at 1 13 38 PM
  • Run rubocop

GREEN

  • Update spec/game_spec.rb so it looks like
    • Screen Shot 2020-09-25 at 1 19 49 PM
  • Run your specs & verify 0 examples, 0 failures

Test 1: Gutter Game

RED

  • Add the following test and verify that it fails with a undefined method 'roll'
    • Screen Shot 2020-09-25 at 1 42 39 PM

GREEN

  • Add the following to game.rb & verify that the test suite is green again
    • Screen Shot 2020-09-25 at 1 52 02 PM

RED

  • Add the following to game_spec.rb & verify that it fails with a undefined method 'score'
    • Screen Shot 2020-09-25 at 1 56 15 PM
    • Screen Shot 2020-09-25 at 2 04 27 PM

GREEN

  • Update game.rb & validate that the test passes.
    • Screen Shot 2020-09-25 at 2 01 11 PM

Test 2: 10 gutter balls & 10 rolls of 1

RED

  • Add the following spec and verify that it fails with expected: 10 got: 0
    • Screen Shot 2020-09-25 at 2 10 35 PM

GREEN

  • Update game.rb & verify that the spec passes
    • Screen Shot 2020-09-25 at 2 16 32 PM

REFACTOR

  • In game_spec.rb, extract game = Game.new into an RSpec let
    • Screen Shot 2020-09-25 at 2 32 27 PM
  • Add a roll_many method to DRY up game_spec.rb loops
    • Screen Shot 2020-09-25 at 2 38 48 PM

Test 3: Picking Up a Spare

RED

  • Add the following test and confirm that it fails with a expected: 16 got: 13
    • Screen Shot 2020-09-25 at 4 30 12 PM

REVERSE, GREEN, AND REFACTOR

  • Our code needs to be changed too much to make this test pass, so skip the test and validate that you have 2 passing tests & 1 skipped test.
    • Screen Shot 2020-09-25 at 4 34 49 PM
  • Update game.rb so that it sums 2 rolls at a time. This will be needed for when we are looking at spares & strikes. Verify that your specs are not failing.
    • Screen Shot 2020-09-25 at 4 50 29 PM

RED(AGAIN)

  • Un-skip the spare test and confirm that it still fails with a expected: 16 got: 13
    • Screen Shot 2020-09-25 at 4 55 11 PM

GREEN

  • Update game.rb so that it tests for spares and applies the spare bonus. Verify that you have no failing specs
    • Screen Shot 2020-09-25 at 5 08 49 PM

REFACTOR

  • Eliminate the ugly #spare comment in game.rb by extracting an intention revealing predicate method. Ensure no failures.
    • Screen Shot 2020-09-25 at 5 13 39 PM
  • Eliminate a magic number and a comment by creating a FRAMES constant.
    • Screen Shot 2020-09-25 at 5 16 10 PM
  • Eliminate magic numbers and comments by creating a PINS constant.
    • Screen Shot 2020-09-25 at 5 17 36 PM
    • Screen Shot 2020-09-25 at 5 17 46 PM
    • Screen Shot 2020-09-25 at 5 17 57 PM
  • Extract the spare_bonus logic into its own method & eliminate a comment
    • Screen Shot 2020-09-25 at 5 27 54 PM
  • Eliminate a spare comment by extracting a method in game_spec.rb
    • Screen Shot 2020-09-25 at 5 27 16 PM

Test 4: Strike

RED

  • Add the following spec and verify that it fails with expected: 24 got: 17
    • Screen Shot 2020-09-25 at 5 36 40 PM

GREEN

  • Account for strikes in Game#score and ensure your tests are passing.
    • Screen Shot 2020-09-25 at 5 45 49 PM

REFACTOR

  • Eliminate comment by extracting roll_strike method in game_spec.rb
    • Screen Shot 2020-09-25 at 5 50 37 PM
  • Extract intention revealing predicate method, Game#strike?
    • Screen Shot 2020-09-25 at 5 53 41 PM
    • Screen Shot 2020-09-25 at 5 53 32 PM
  • Extract strike_bonus logic into its own method
    • Screen Shot 2020-09-25 at 5 56 12 PM
    • Screen Shot 2020-09-25 at 5 57 50 PM

Test 5: The Perfect Game

JUST GREEN

  • Add the following test & verify that it passes
    • Screen Shot 2020-09-25 at 6 02 58 PM

A Rails Feature From Memory: Part 2 of 2

You'll be expected to do this from memory

Removed from this Rock. See you next Quarter!

Ruby & Rails Dev Env Setup (One Time)

For WLS 1.0 & Ubuntu 18Dev Environment Setup

Complete the following 2.0 README sections under Windows Linux Subsystem (WLS) & Ubuntu 18 setup

These steps have been copied from 2.0's README to reduce confusion.

Ubuntu Installation

  • With the VPN turned off, Install Ubuntu 18 LTS from the Windows Store (you made need to put in a helpdesk ticket for this step)
  • Open Ubuntu from Windows & enter a username and an easy to remember password
  • Click the little orange Ubuntu icon in the top left corner of the window -> edit, and note the Ubuntu specific clipboard commands
  • Run sudo apt-get update && sudo apt install gnupg2 && sudo apt-get install libpq-dev imagemagick
  • Close Ubuntu by running exit and re-open

Ruby Installation

You may use the Ruby manager of your choice. These installation instructions are for Ruby Version Manager (RVM).

  1. Load keys for validating the installer integrity gpg2 --recv-keys 409B6B1796C275462A1703113804BB82D39DC0E3 7D2BAF1CF37B13E2069D6956105BD0E739499BDB
    • Be sure to check for and accept any Windows security prompts caused by the above command.
    • Disregard the error from the above command: gpg: keyserver recieve failed: General Error
  2. Download and run the installation script \curl -sSL https://get.rvm.io | bash -s
  3. Close Ubuntu and re-open
  4. Install Ruby rvm install 2.6.6

Node Installation

You may use the Node manager of your choice. These installation instructions are for Node Version Manager (NVM).

  1. Install NVM curl -o- https://raw.githubusercontent.com/nvm-sh/nvm/v0.35.3/install.sh | bash
  2. Exit and reopen Ubuntu
  3. Install Node nvm install 14.17.0

Bitbucket Access

Even though you will not need Bitbucket Access for this Rock, this step will walk you through setting up your SSH keys.

Add a ssh key to Bitbucket using the following steps. Additional details are available from Bitbucket

  1. Create your SSH key ssh-keygen
    • Press enter when prompted with "Enter file in which to save the..."
    • Press enter twice when prompted with "Enter passphrase"
  2. Set permissions on your keys sudo chmod 600 ~/.ssh/id_rsa && sudo chmod 600 ~/.ssh/id_rsa.pub
  3. Run ssh-agent (include backticks)
    eval `ssh-agent`
    
  • Add your key to the SSH keychain ssh-add ~/.ssh/id_rsa
  • View your public key cat ~/.ssh/id_rsa.pub
  • Copy your public key from above, and add it to your Bitbucket Account's SSH Keys section
  • Verify that the key is setup properly ssh -T git@bitbucket.org
  • Say "yes" when asked if you'd like to add to known hosts
  • You should see your username and some message about how shell access is disabled
  • Exit and reopen Ubuntu
  • Run ssh -T git@bitbucket.org again just to ensure you can still connect to Bitbucket after a restart

Visual Studio Code Setup

Since we're running the project in WSL, we need to configure VS Code for "remote" development.

  1. Install VS Code
  2. Install the Remote - WSL extension
  3. Open the project via the Ubuntu console
    1. Open the WSL terminal (e.g. Ubuntu 18.04)
    2. Naviagate to your repo folder and open VS Code code .
  4. OR open the project from within VS Code
    1. Start VS Code
    2. Press F1
    3. Enter Remote-WSL:New Window and hit enter
    4. Use the File menu to open your project folder

Tell Git Who You Are

By default Git does not know your name or email. Introduce yourself.

  • git config --global user.email "you@example.com"
  • git config --global user.name "Your Name"
Sign up for free to join this conversation on GitHub. Already have an account? Sign in to comment